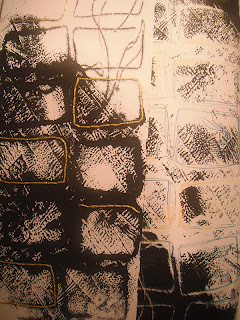
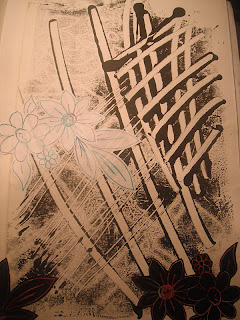
First up we have the Gouache Wash Off which uses gouache paint and a permanent or water resistant ink (black Indian ink is good for this).
The idea is to paint your paper (which could have a patterned, plain, painted (acrylic paint comes out really nicely!) or any kind of background) with the gouache paint. Remember that the areas you cover with the paint are the areas that you will see later on so if it is patterned, think about the composition and where your design is placed.
Once the gouache is dry (don't rush this step, the gouache has to be bone dry and feel about room temperature to the touch- if it feels cool it is probably not quite dry yet) cover the whole thing in the black Indian ink and leave to dry (or dry with a hairdryer).
Next up is where the magic happens!! Carefully but firmly run your paper under the tap, rubbing at where the gouache pattern is hidden. The gouache and the ink above it start to wash off, leaving the pattern or colour of the paper beneath revealed! Keep rubbing at the gouache until the water runs clear over the piece. Hang up and leave to dry!!
You can experiment with the colours underneath your gouache. Below is an example of what happens when you paint acrylic underneath. I think it has worked really well as the colours are vibrant and work well together. What is also quite nice is where the ink hasn't completely come off, contrasting between soft and hard edges.
This is another example of an acrylic under surface, but here it hasn't worked so well as I have used viridian coloured ink rather than black ink. The colours below are stronger than the top layer of ink so it has given a weathered painted door effect which is also quite nice.
The next technique is Monoprinting. This is quite a popular technique as it is easy and quite kid friendly. If you don't want to get completely messy then there is the oil pastel print.
Take an oil pastel and scribble a block of colour onto your paper, try mixing a few different colours to create different coloured lines.
When you have finished your design, turn the paper over and check out your drawing!! For more colour you could go over it again with different colour pastels underneath, or just turn the drawing to another section of the pastel block. You can reuse the block lots of times and it doesn't dry out!
Another, more messy way, is to use the printing ink and your roller. On a cleanable surface (ceramic tile, glass or perspex sheet or even a sheet of acetate), put a little bit of the ink- remember, a little goes a long way and you can always add a bit more if there isn't enough- on the surface, rolling it out to make a nice even covering. A good tip I was told is to listen to the sound the roller makes, when it sounds sticky but not squelchy, then it is a nice, even consistency! Lay your paper gently over the ink and start to draw your design.
Remember that this technique is more likely to pick up even small pressures so don't lean on the paper whilst you are drawing (unless it is the effect you are going for). Try and use lots of different implements for different mark making techniques.
Finally for this part, there is the Resists.
You could try wax resist using a candle or a wax crayon (or even an oil pastel) to draw your design onto your surface. Once the design is completed then brush over the whole thing with ink, or watercolour. The design should stay intact and look beautiful on the page. An interesting idea would be to build up your colours and ink washes by adding layer after layer of wax design and wash.
For fabrics, this technique is called Batik, and is used to create many intricate patterns on fabric for clothing, scarfs, bags etc.
Works by Kay Shaffer
I have also been experimenting using masking fluid, which is a kind of liquid latex. Paint the masking fluid over the page in your design, let dry, paint over with the paint or ink, and then when dry, rub off the masking fluid with your finger. It completely comes off and leaves the paper underneath startlingly intact.
I experimented for the first time with this technique today, and enjoy it simply because of it's textural qualities.
I did try taking the masking fluid off, however thought that the blue underneath was too striking and overpowering so painted the flower with the fluid again to keep in the textures.


No comments:
Post a Comment