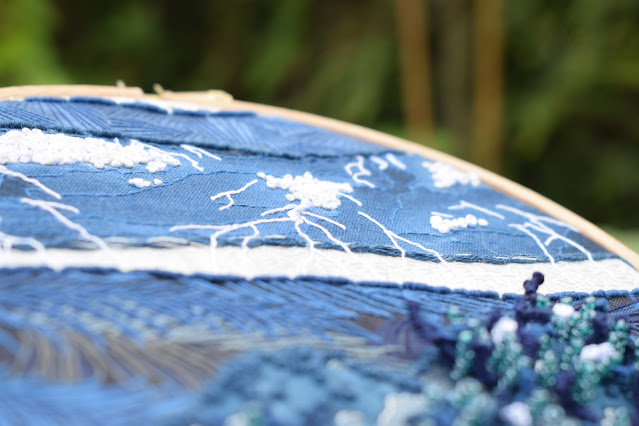
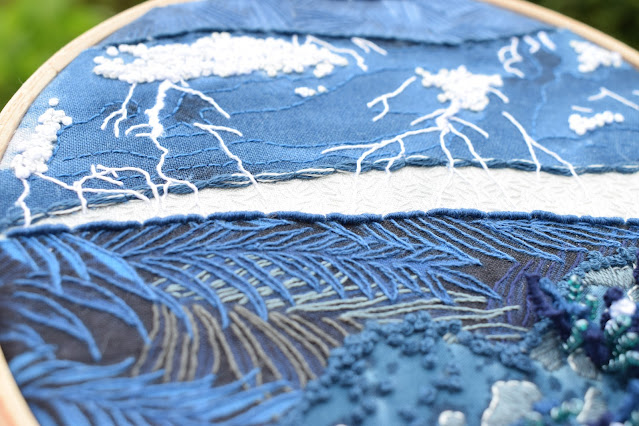
The feather layer took quite a long time to complete and was mainly done on the bus in the mornings on my way to work. I've used five different colours, with a single strand of each and worked whipped back stitch either around the feather strands, or just up one side of each strand depending on the size. I love the different colours used here, and they are often reflected elsewhere in the hoop as well which really helps to balance the colours out across the landscape. I've used fairly flat, harsh lines on the edges of these fabrics, either with couched threads or bullion knots to keep it really neat and highlight the jaggedness of the piece - not a theme I usually go for!
French knots have been used to edge this rock layer, and the knots themselves drift down into the fabric where there are bare areas just to add some texture and depth. I've created some fun foliage with sticks of beads stacked on top of each other, and some drizzle stitches which just go wild and twirl around in any direction. These stitches have again been done in lots of different colours, including a few in a silky white thread to match the forks of lightning and again hint at them being highlighted and flashing in the landscape.
So the top layers themselves work really nicely together. The top fabric had block shapes of colour in it, which is quite hard to explain but I've used these shapes and covered them with these directional straight stitches. So each section of straight stitches is a splodge shape in the fabric but it reminds me of rain which fits in perfectly.
For the lightning fabric - this is actually a print on the fabric, although some areas I have taken artistic license and added in more lightning where there were big gaps (like in the middle which then looked really odd). The clouds have been puffed out with french knots, using a really pale grey for the base colour and then adding knots on top of the knots in a DMC silky white thread which does glow in the light. The thinner strands of lightning are a whipped back stitch, with just normal white embroidery floss for the back stitch, and the silky thread for the whipped stitch, and the thicker strands of lightning are lots of straight stitches worked next to each other at an angle to cover the print beneath. It's not really neat enough for a satin stitch but it's that sort of technique.
Blue lines of single strand back stitch have been added to the blue background fabric where the colours slightly change and, to help keep the top of this layer nice and neat for when I added the bullion knots, a discreet running stitch has been added.
The streaks of lightning have been taken off of the fabric layer they are on and into the grey layer underneath to help the piece flow and look like they are adding to this horizon glow (like an electric waterfall). I really like the couched threads that the lightning goes over as well, which is made up of a couple of dark blue threads and a strand of white loosely twisted together.
So there you have it!! A little lightning piece to add to my collection, and Reece has given his approval on it too which is a relief!
The stitches used in this piece are: straight stitch, bullion knots, french knots, back stitch, running stitch, whipped back stitch, couching, seed stitch, satin stitch, drizzle stitch and beading.


No comments:
Post a Comment