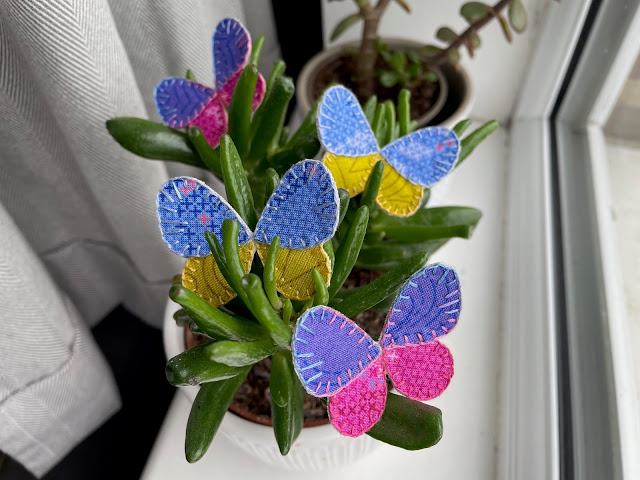
I am trying to keep a month ahead of the Stitchscape swap this year to help me not get stressed about deadlines and to allow additional time to create more. Some days I don't touch this hoop at all, and even on occasion for a couple of weeks so being ahead of myself really helps out.
I think as a still fairly new mum, I often find myself saying 'help the future Beth out by doing a little job now', as one of the biggest things I've learnt is to be organised as much as possible and get whatever I can done early (or the day before) so that I'm not panicking and forgetting essentials later on when something else pops up. It's a new mantra that I have on a rolling cycle in my brain on a daily basis.
On the day I started I had also sorted through a load of magazines I was going to recycle and came across this page in the National Trust magazine so I ripped it out thinking that it would make an interesting texture for the back of my butterflies. I should think that there are several of you reading this who would have had a better idea than me on how to make these little creatures, but in the end I went with creating a fabric sandwich, trapping a layer of calico as well as the magazine page into my hoop. It wasn't particularly easy but I didn't rip the paper so that was a good start!
The wing fabrics were picked up from the Ardingly quilt show in a scrap bag and I thought they went really nicely together. It would have been too easy to do all four in the same colour so it is more fun to do two of each!
After tacking (with one long stitch per wing to avoid poking too many holes in the paper), I stitched the bottom wings down first using blanket stitch, trying to be as neat and as regular as I could. I quickly discovered that if I pulled the thread too hard, or if it knotted whilst pulling through, the paper at the back would tear so I had to be quite sensitive in my stitching. I had to limit the times I poked the needle through trying to find the right place for the next stitch too as the paper wouldn't recover like the fabric does and I'd end up with a really battered looking butterfly underwing.
Something I don't usually consider is knotting my thread - if you look at the back of all of my Stitchscapes I always knot my thread because it's safer and no one sees it once you've finished the piece but, in this case, because they are fluttering freely from the surface of the card, I can't have ugly knots everywhere! I still knotted the thread but I've hidden them all underneath the top wings, then also discreetly knotted on the back when I'd finished a section and carried the threads through elsewhere to cut it.
I haven't added too much detail to these butterflies because I am slightly worried about the paper on the back. It would definitely be a technique to work on if I wanted to use it again - I wonder whether you can add vilene to a magazine page to help support it and stop the tearing? Or would the heat required just damage the ink and the paper? Does anyone know?
Happily, they all cut out with no mishaps and are surprisingly strong considering the two sides are attached by not very much fabric at the centre. The calico is completely hidden and the paper at the back looks quite nice actually so I think it was worth it. I think the paper also gives support and shape to the wings - if they had just been made with the fabrics they would be flopping around all over the place.


No comments:
Post a Comment