How To: Frame Your Stitchscape In Its Hoop
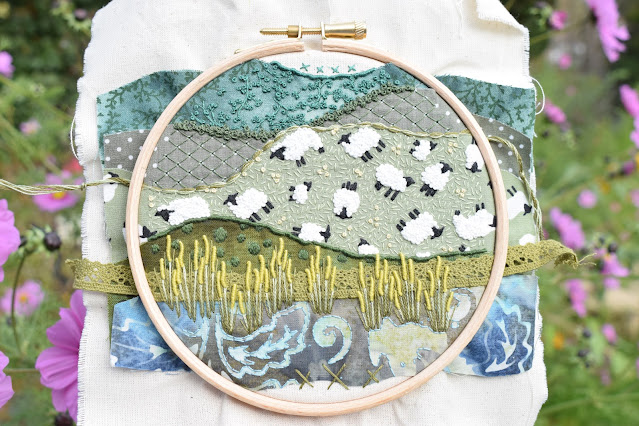
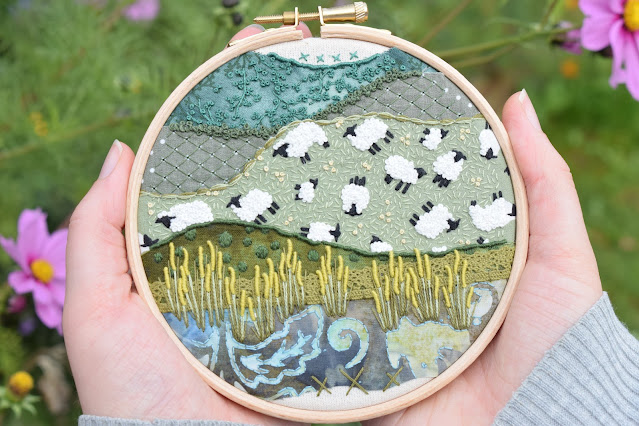
There are many different ways you can present your embroidery; you could turn it into a cushion or a quilt, bind the edges and hang it like a mini quilt, stretch it over mountboard for framing (see my tutorial here) or keep it in the hoop! I have recently started preferring my Stitchscapes in hoops - it works with how they are stitched and makes them easier to store to take to workshops but they also look fantastic hung up on your wall as an alternative to the traditional squared frames. You don't have to have embroidered anything on the fabric framed inside the hoop either; in recent years it has become a popular way to display beautiful printed fabrics that you can't bear to cut into. It's cheap and cheerful and super effective. You can easily swap fabrics in and out to suit your decor or mood so what's not to love!

There are also various ways to frame within a hoop, some people will just stretch the fabric tightly between the two hoops and trim the fabric away right at the hoop edge, or allow a tiny extra bit of fabric to enable them to glue their fabric to the inside hoop with a hot glue gun. I personally don't like these ways of doing it although I appreciate that it's quick, easy and neat. My thought is that if something happens to the hoop or you want to take the fabric out and use it elsewhere or re-frame it, you haven't got much fabric left to move it around. I, instead, leave a much more generous allowance and run a couple of rows of running stitch around the back to draw it up, keeping as much fabric as possible whilst still enabling a neat finish so this tutorial will hopefully show you how!

Firstly, make sure that you have pulled your fabric really tight and that the screw has been tightened with a screwdriver. If you are framing a Stitchscape, you might want to take some time to make sure that your layers of fabric aren't bubbling at the edges so gently pull on the individual fabric layers as well as the backing calico itself.
Once you are happy with the tightness of the fabric, trim your fabric in an even circle, about 6cm/2" from the hoop edge. If you are unsure then leave slightly more, and if you haven't got much fabric surrounding the hoop (like I often don't because I haven't squared it, or been generous with my backing fabric) then just neaten it and leave as much as you can.
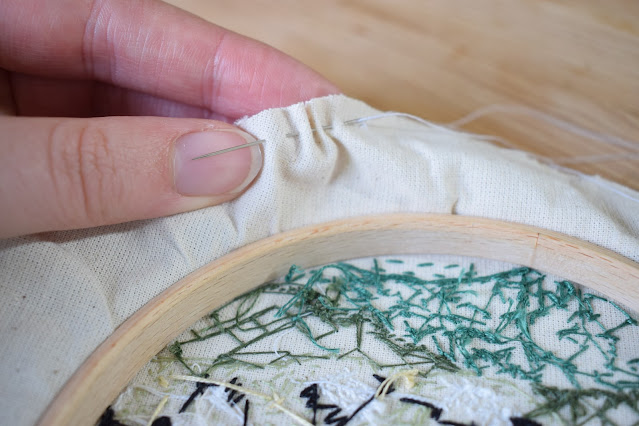
Taking a long length of sewing cotton (about twice the circumference of your hoop), securely knot the cotton about a centimetre from the fabric edge. Here I have used a white Gutermann sewing cotton (the type you'd put through a sewing machine) in only a single strand. You can also use an extra strong thread, or double up on the sewing cotton if you prefer more security.
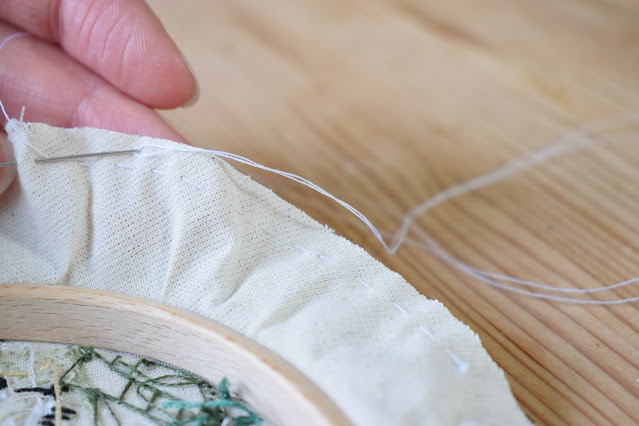
With your needle and thread, start to work an even running stitch (in and out) all the way around the fabric edge, keeping a consistent distance from the hoop if you can. It's easier to keep an even sized stitch if you work a few weaves in and out at a time, maybe with a slightly longer needle. Keep an eye on the thread as you work around and make sure that there are no knots, catches or twists that might prevent you from pulling the thread later on.
If you are using this technique to frame a Stitchscape, or a piece with several fabric layers, my top tip would be to go round the first time stitching into the backing fabric only. Here I am making sure that my needle isn't accidentally catching on the layers of fabric above. I find that this makes it much easier to draw up and creates a neater finish.
Once you are all of the way around the hoop and back at your original knot, make sure that you finish with the needle and thread on the other side of the fabric, this makes it easier to pull through as your needle will be on the correct side once the fabric is gathered up and pulled into the middle.
Holding the thread close to where it comes out of the fabric, start to gently pull the thread so that the fabric begins to bunch up. To prevent the thread from snapping, keep moving your hand down to the fabric end as you pull more of the thread back out of the fabric.
If you encounter any resistance then stop and try and find where the problem is. It might be that you have a little knot you need to get out, or that something has tangled itself around the thread that you need to remove.
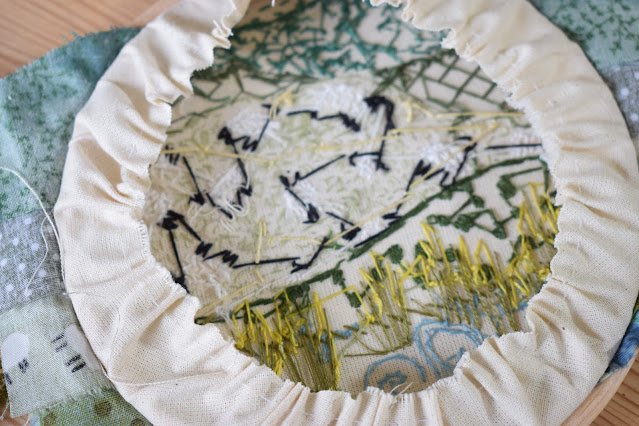
As you pull the fabric should be tightening and drawing up into the centre of the hoop. Sometimes it needs a little encouragement to draw in the right direction.
If you are drawing a larger hoop and find that the first side isn't drawn up as tightly, you can hold the thread and push the fabric along the line of stitches, pulling it in the opposite direction to where you are pulling with the thread.
When you are happy with how the fabric is drawn up, you will need to try and hold the tight tension of the sewing cotton, pinching the thread and fabric in one hand whilst making a secure knot with the needle and thread to stop it coming undone. To do this I nip my needle under the backing fabric to create a loop of thread and pass my needle through the loop to make a knot. You can repeat this a couple of times to make it extra secure.
Don't cut the thread yet!
If, like me, you are framing a Stitchscape, then you will still have the layers of fabric flapping around at the hoop edge so these will also need stitching down. Pass your needle from the knot you've just made, through the fabric and nearer to the hoop edge.
Repeat your running stitches in a second circle, keeping it as evenly from the edge of the hoop as you can.
When you get to a section of fabric, fold that piece down over the backing fabric and stitch through both this fabric and the backing calico. You might find that these stitches can't be as neat as before with the multiple fabric layers but as you've already drawn up the backing fabric this won't matter so much. Keep working around the hoop, pulling down the fabric as you work around where it is needed.
If you come across any trimmings or threads these can either be stitched over with the running stitch as well or, for more bulky trimmings, you might want to again ignore this section and stitch it down separately later.
Keep working all of the way around until you are back where you started and again gently pull on the thread where it comes out of the fabric. This time it won't draw up as much but you should find that it tightens a little bit. Repeat the hold and pinch technique with the thread whilst you make more knots to keep this nice and secure.
Depending on how you are going to display this piece, you could glue or whip stitch (over-sew) a piece of felt to the back to hide all of the rough edges - which works really well if you are giving this as a gift - but as I take my hoops to workshops to show what the front and back of my stitches look like, I will leave my hoops with the backs showing. Because of this, I like to neaten up the backs a little and, using a small pair of scissors, I trim just the excess fabric layers to about a centimetre from the running stitch.
You can see the difference it makes above, the left hand side has been trimmed and the right hand side hasn't.
So there you have it! That's all you have to do and it will only take a few minutes (depending on the size of your hoop). If you are going to stitch a circle of felt to the back, to get the right size of circle, you can draw around the outside edge of the inner hoop before you put it all together and that will be exactly the right size to hide all of your fabrics on the back.
I hope that this has helped you if you are thinking of framing in the hoop, if there is anything that isn't quite clear or you are struggling with then please don't hesitate to contact me on any of my social media pages, links for which can be found on my website (
here). And if you do use this technique then I'd love to see what you have been up to!








Brilliant work
ReplyDeleteGreat!
ReplyDelete