Sunday 28 February 2021

Stitchscapes For Sale!

If the recent and current lockdowns in the UK have caused others to not do anything, they've caused me to become fairly productive on the original Stitchscape front! I think I have been creating places that I would really love to be able to visit again but currently due to travel restrictions and the 'stay at home' motto, I can only visit them in my imagination or in my hoops. 

Really, I should have been using this time to churn out new Stitchscape kits but I have to be in the mood for those and I'm really not at the moment however, I have tons of ideas for original hoop pieces all jostling to get out first! It's amazing really as I was starting to worry that I had lost my 'mojo'. When I first started creating Stitchscapes it was just for fun and I had so many ideas I couldn't get them out fast enough! When it turned into a business, more and more time was spent on kits, making kits, advertising, accounting, workshops....and I didn't have much time to embroider and create just for myself any more. But suddenly I have lots of time and that is all I want to do! Which is just such a lovely feeling. 

This over-productiveness has led to quite a cramped hoop wall though and I would really love to see some of these pieces find new homes so that I have room to carry on creating. Therefore I am selling a huge bunch of previously unavailable original Stitchscapes in an online sale on the 1st March 2021!

There are all different sizes, colours and themes available (more than in these photos as I've added more since taking the images) and the different sizes of hoop are different standard prices. 

Initially the sale will be held on my Facebook page (in a special photo album) and on my Instagram stories, and I will ask that if there is a piece you would like to buy, that you comment with SOLD on the piece so that I can then private message you to arrange the sale and check where you are in the world in case postage costs need to be applied (free UK postage). Because it's across a couple of different social media sites, I will be flicking between the two and it will be a first come, first served basis. 


It's been really hard not being able to attend or show my pieces at craft fairs so I haven't been able to sell as many originals as I would usually, although I am very grateful to everyone who has purchased from me over this lockdown - you have all been amazing and there are so many hundreds of Stitchscape kits out there across the world now, it's rather astounding!


But anyway, I'm hoping that some of these lovelies will find new forever homes and any that don't sell on my event on the 1st March will end up on my website or Etsy (split between the two) over the next few weeks so, if you miss out, don't worry. Of course, the ideal situation would be for them all to sell! How amazing would that be? Like winning the lottery.  


Re-Framing Stitchscapes


Over the last couple of months I have been taking Stitchscapes that were mounted onto square board, but never properly framed, and putting them back into hoops to frame them. The reason they weren't framed in box frames like my others was because I have run out of storage for all of the box frames and it was easier to store them as flat pieces. But, because I also took them with me as examples to workshops, the fabrics were getting tatty and the 3D stitches squashed so I wanted to do something to try and avoid them getting worse. 

Over lockdown (since March last year! A whole year of lockdowns and COVID troubles - who'd have thunk it?!) I have also been creating a hoop wall as a way to display all of the Stitchscapes I was making and I have come to really love this way of displaying them. It makes more sense I suppose as the Stitchscapes are created within the circle without moving the hoop so they look a bit nicer when framed by a circle. 

It was all going swimmingly well and my hoop wall looking marvellous with all of these re-framed hoop pieces but then I came across a problem where some of my bigger Stitchscapes had actually been stitched in a square embroidery hoop! So they didn't quite fit within the circular hoops of the same size. 

I decided that the best thing to do was to go up a hoop size in the circular hoops (square ones are pricey!) and to see what it looked like and, for the most part, it worked really well - see above picture. But there were just some areas which then looked a little naked and bare so I decided to re-work some of these areas and improve/add stitches to update it. 

So for Bartholomew's Oast House (click on the link to see the original post about this piece) I continued some of the single strand back stitches around the clouds of the top layer and added some big crosses to fill the calico gap at the top. Because I hadn't got quite the same colour blue for the back stitch and there was some fraying of the fabric edge, I also worked more stitches into the whip stitch at the edge of this layer to help bring that together and fix those issues. 

At the sides I filled in more of the plain green fabric with seed stitches, matching as closely as I could with the original colour. You can sort of see the colour difference here but I don't think it's enough to stand out majorly. Luckily the other fabrics did already have gaps in the stitching, or the original stitches had gone right up to the edges so that doesn't notice here. 


On the other side, I again worked more of those seed stitches, but also added more stitches to the wheat plant print underneath, matching the thread colours as closely as I could and working the same techniques and thicknesses as before. 


At the bottom, more raw edges of the blue floral had been exposed so I added more big loose crosses to help hold those edges down. It's perhaps the most noticeable fix as I couldn't blend it more between the existing crosses and that's the closest colour match I could get but, if anyone asks, the colour difference is intentional (sssssh, don't tell!).


I think Bartholomew will be much happier in a hoop, all of the rough edges have been tidied up (especially the tree trunks which were fraying a bit) and there will be a circle of felt added to the back as well to keep things neat. 


I have done the same thing to my Lulworth Cove Stitchscape which was also stitched in a square hoop. Not only that, but there have been sections of this piece which have really bugged me, namely how the fabrics have ended at the sides of the piece. If you click on the link to visit the original blog post about this piece you can see at the bottom what it looked like on a square board. Because it was based on a photograph I had cut small pieces and bondawebbed (glued) them on to the calico, which was fine for when I was working in the hoop but then on the square they just ended with harsh raw edges and it didn't look very nice. 


Putting it back into a circular hoop has solved these problems for me - apart from at the bottom where those green pieces just ended within the hoop itself. I think I have made this look much prettier now though as I have softened those rough edges by carrying on from the original seed stitches over the edge of the fabric where I now have the room to, working them onto the calico in some areas. I've matched the thread colours as much as possible, and on both sides of that 'walkway' into the bay, I have added more picot stitches and green beads. Some of the picot stitches are right on or over the fabric edge so you almost don't notice it's there!


The un-stitched gaps at the side of this piece were a bit more obvious than in Mr B's Oasthouse, so I have added more of the fly stitches on top of the cliff above to follow the line of the hoop as well as more running stitches, whip stitch, fly stitches and moss stitch on the opposite side of the bay, below. This wasn't so well matched in terms of colour, I can see the difference but I don't know if I'm just being picky? I've taken the colour more into the layer itself and added more moss stitches within the existing areas to help blend it together. 
Because this green layer then went further toward hoop edge than the yellow and blue whip stitch layers above it, I have added more to these layers as well and I'm much happier with it!


There was also a bigger gap at the top of the piece with empty calico, so I have added in yet more sun rays! It already had lots and lots of rays, all delicate one or two strand long stitches in about five colours, but I've now added another colour and taken this up even further. It's a pale yellow to help make it look like it's fading out into the distance. 


I think re-framing these pieces has solved a lot of problems and I have also learnt a lot about how and where to position my fabrics in the future, and how I would like to present my pieces. 
I'm quite happy for them to remain in hoops with felt at the back, and I've now got some really lovely little tags which I can stitch onto the back and write the name, date and pop my signature on. If anyone wants them in frames, I also have a framing technique where the whole kit and caboodle is framed - hoop and all!


Monday 8 February 2021

Snowy Stitchscape


Just in time!! Whilst the rest of the UK seems to have been buried in snow by another 'Beast from the East', my little corner is a bit neglected and we have had very disappointing amounts of snow so far. At best it's an over enthusiastic sprinkle, like a child getting carried away covering a sponge cake in icing sugar whilst their parents' backs are turned. It's enough to make me seriously consider moving to Yorkshire for better snow days!!
Still, I'll take what we've got for now as it's still snowing tiny, perfect little flakes. Having dashed out in to the snow to photograph my latest Stitchscape, I can tell you that the flakes currently falling are the most snowflakey looking flakes I have ever seen! Like small elves are sat in the clouds folding bits up and cutting them as you would at Christmas to form those symmetrical patterns in paper for a window display. 

Anyway, I was very pleased to get this piece finished this morning. Not because it took a long time (it really didn't once I started stitching!) but because there was enough of a ground cover for me to take some pretty photos of it. 
This Stitchscape was actually started in August, at the same time as the Daffodil piece, and was put together for my Youtube video (see here) on how to select and layer fabrics. It's a long video but if you want to skip specifically to the section on this hoop, fast forward to about 56.40 minutes in (told you it's a long video!!). This piece has also been hanging around for workshops as an example of how to layer fabrics but I don't like to keep them as example pieces for too long because I get repeat workshop goers so it gets boring for them, plus the pieces get frayed and tatty after a while. 


For this piece I had already got it in my mind that this was a snowfall scene, mainly because of the lighter blue layer, and the white snowy fabrics followed on from that. I seem to recall picking the two blue fabrics out of my scrap box because they were on the top together and it all kind of followed on from there. 
When I finally got around to stitching it, I sort of hopped all over the place rather than working systematically through the layers. I had an idea to use more of the craft stamens that I'd used in one of my 
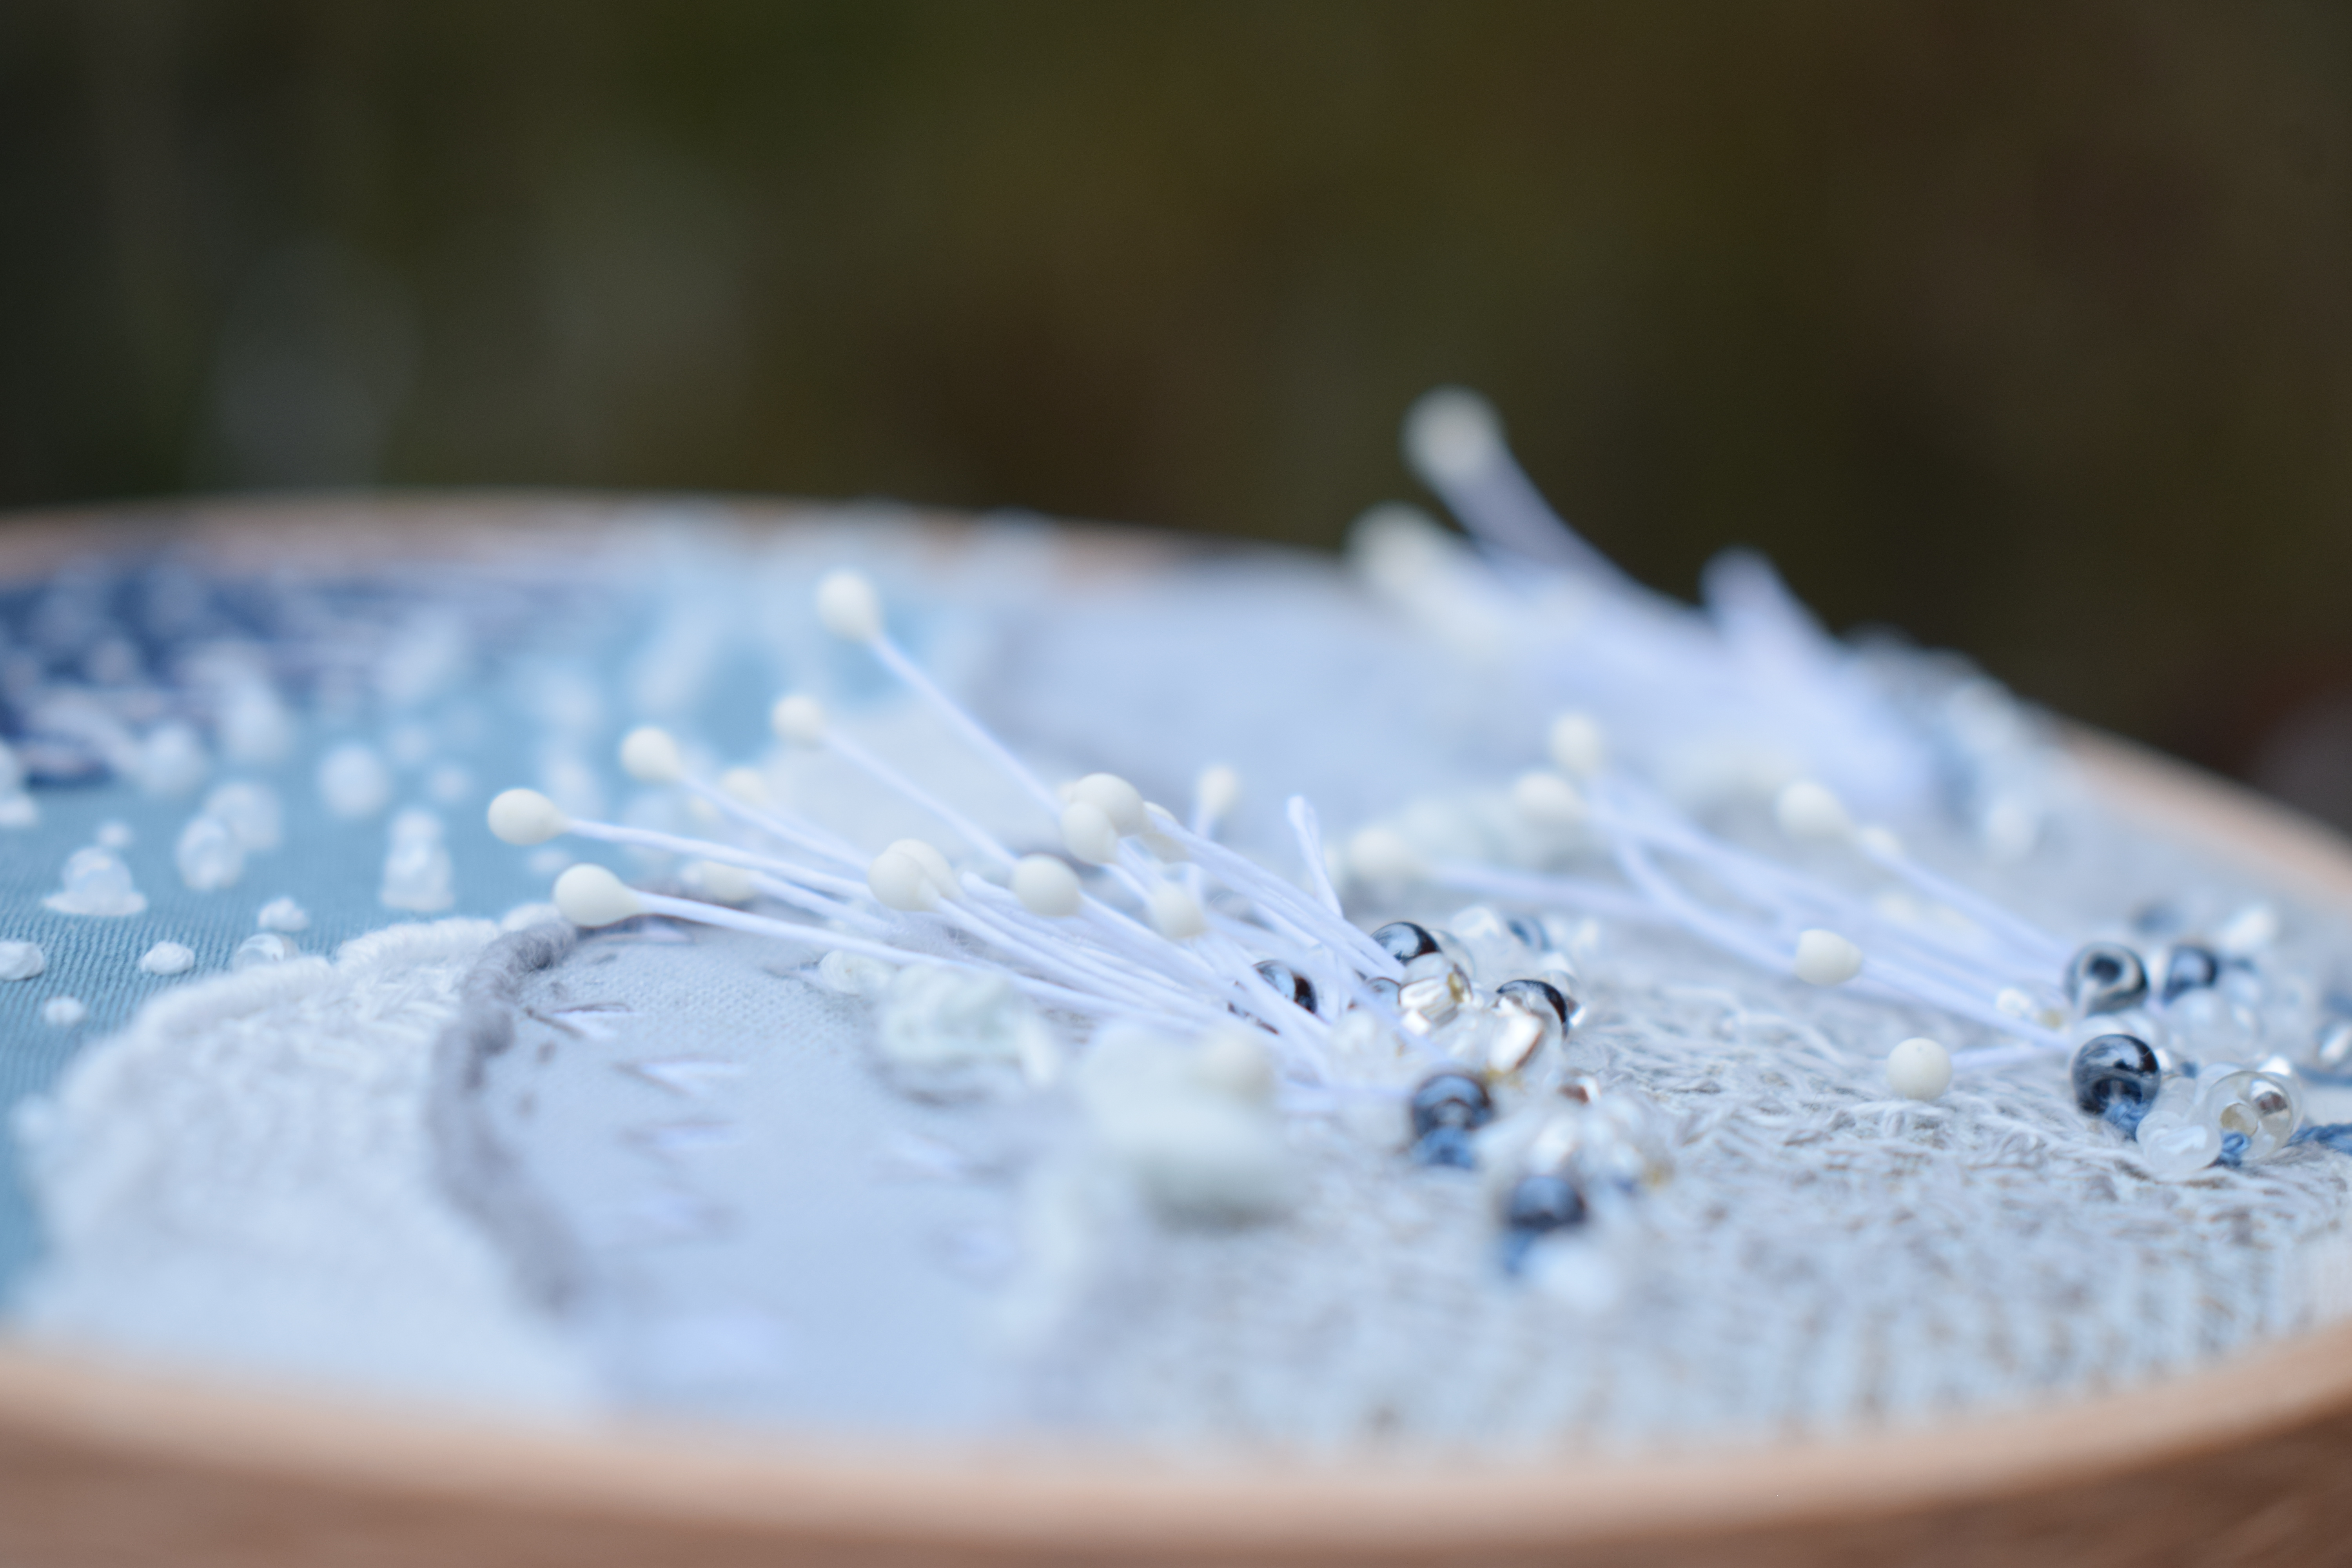
mini seascape pieces a couple of weeks ago and wanted to take it a bit further this time. Previously I folded the stems into quarters, but I wanted a bit more height here to make them look more unkempt and plant-like so started with just folding them in half and stitching them down at the bottom. It needed another level put in though so I did end up also adding some stems folded into quarters to give a fuller appearance. Having started a test patch on the right hand side, I realised that I really needed to fill the layer with stitches before adding any more stems so started filling it with an all over seed stitch, and working a single strand of whip stitch in white around some of the seeds to hint at a dusting of snow on the ground. 

The couched yarn top to this layer, and the other two clusters of stems, were added in much later as I moved on to other areas but the yarn is actually three strands in total; two of Stylecraft Special DK yarn in Silver and one in a fluffy, shiny, fancy yarn I picked up at a craft fair somewhere. I've twisted these together but tried to keep the shiny yarn mostly on the top so that it will pick up the light, then loosely couched all three on top of the layer so that it bunches up to give extra volume. 

The layers above are really simple and didn't take long to do at all really - I wanted the emphasis to be more on the contrast of colours and because the hoop is fairly small, it didn't need to be packed with extravagant stitch work. 

The grey rocky fabric has dark grey (single strand) fly stitches underneath each little 'v' shape in the pattern - not on the line of the pattern itself because I wanted to keep the white lines, and edged in bullion knots. 

Above it, the Linea fabric (by Makower) was initially covered with a single strand of vertical back stitch following the lines of the print. It was a really tricky fabric to cover actually because it's such a fabulous pale grey, if the light was at all dull when I was stitching it, I couldn't see the lines to stitch over! I then went over it again with two strands of back stitch following the horizontal lines to make it even paler and bring out that snowy feel. 

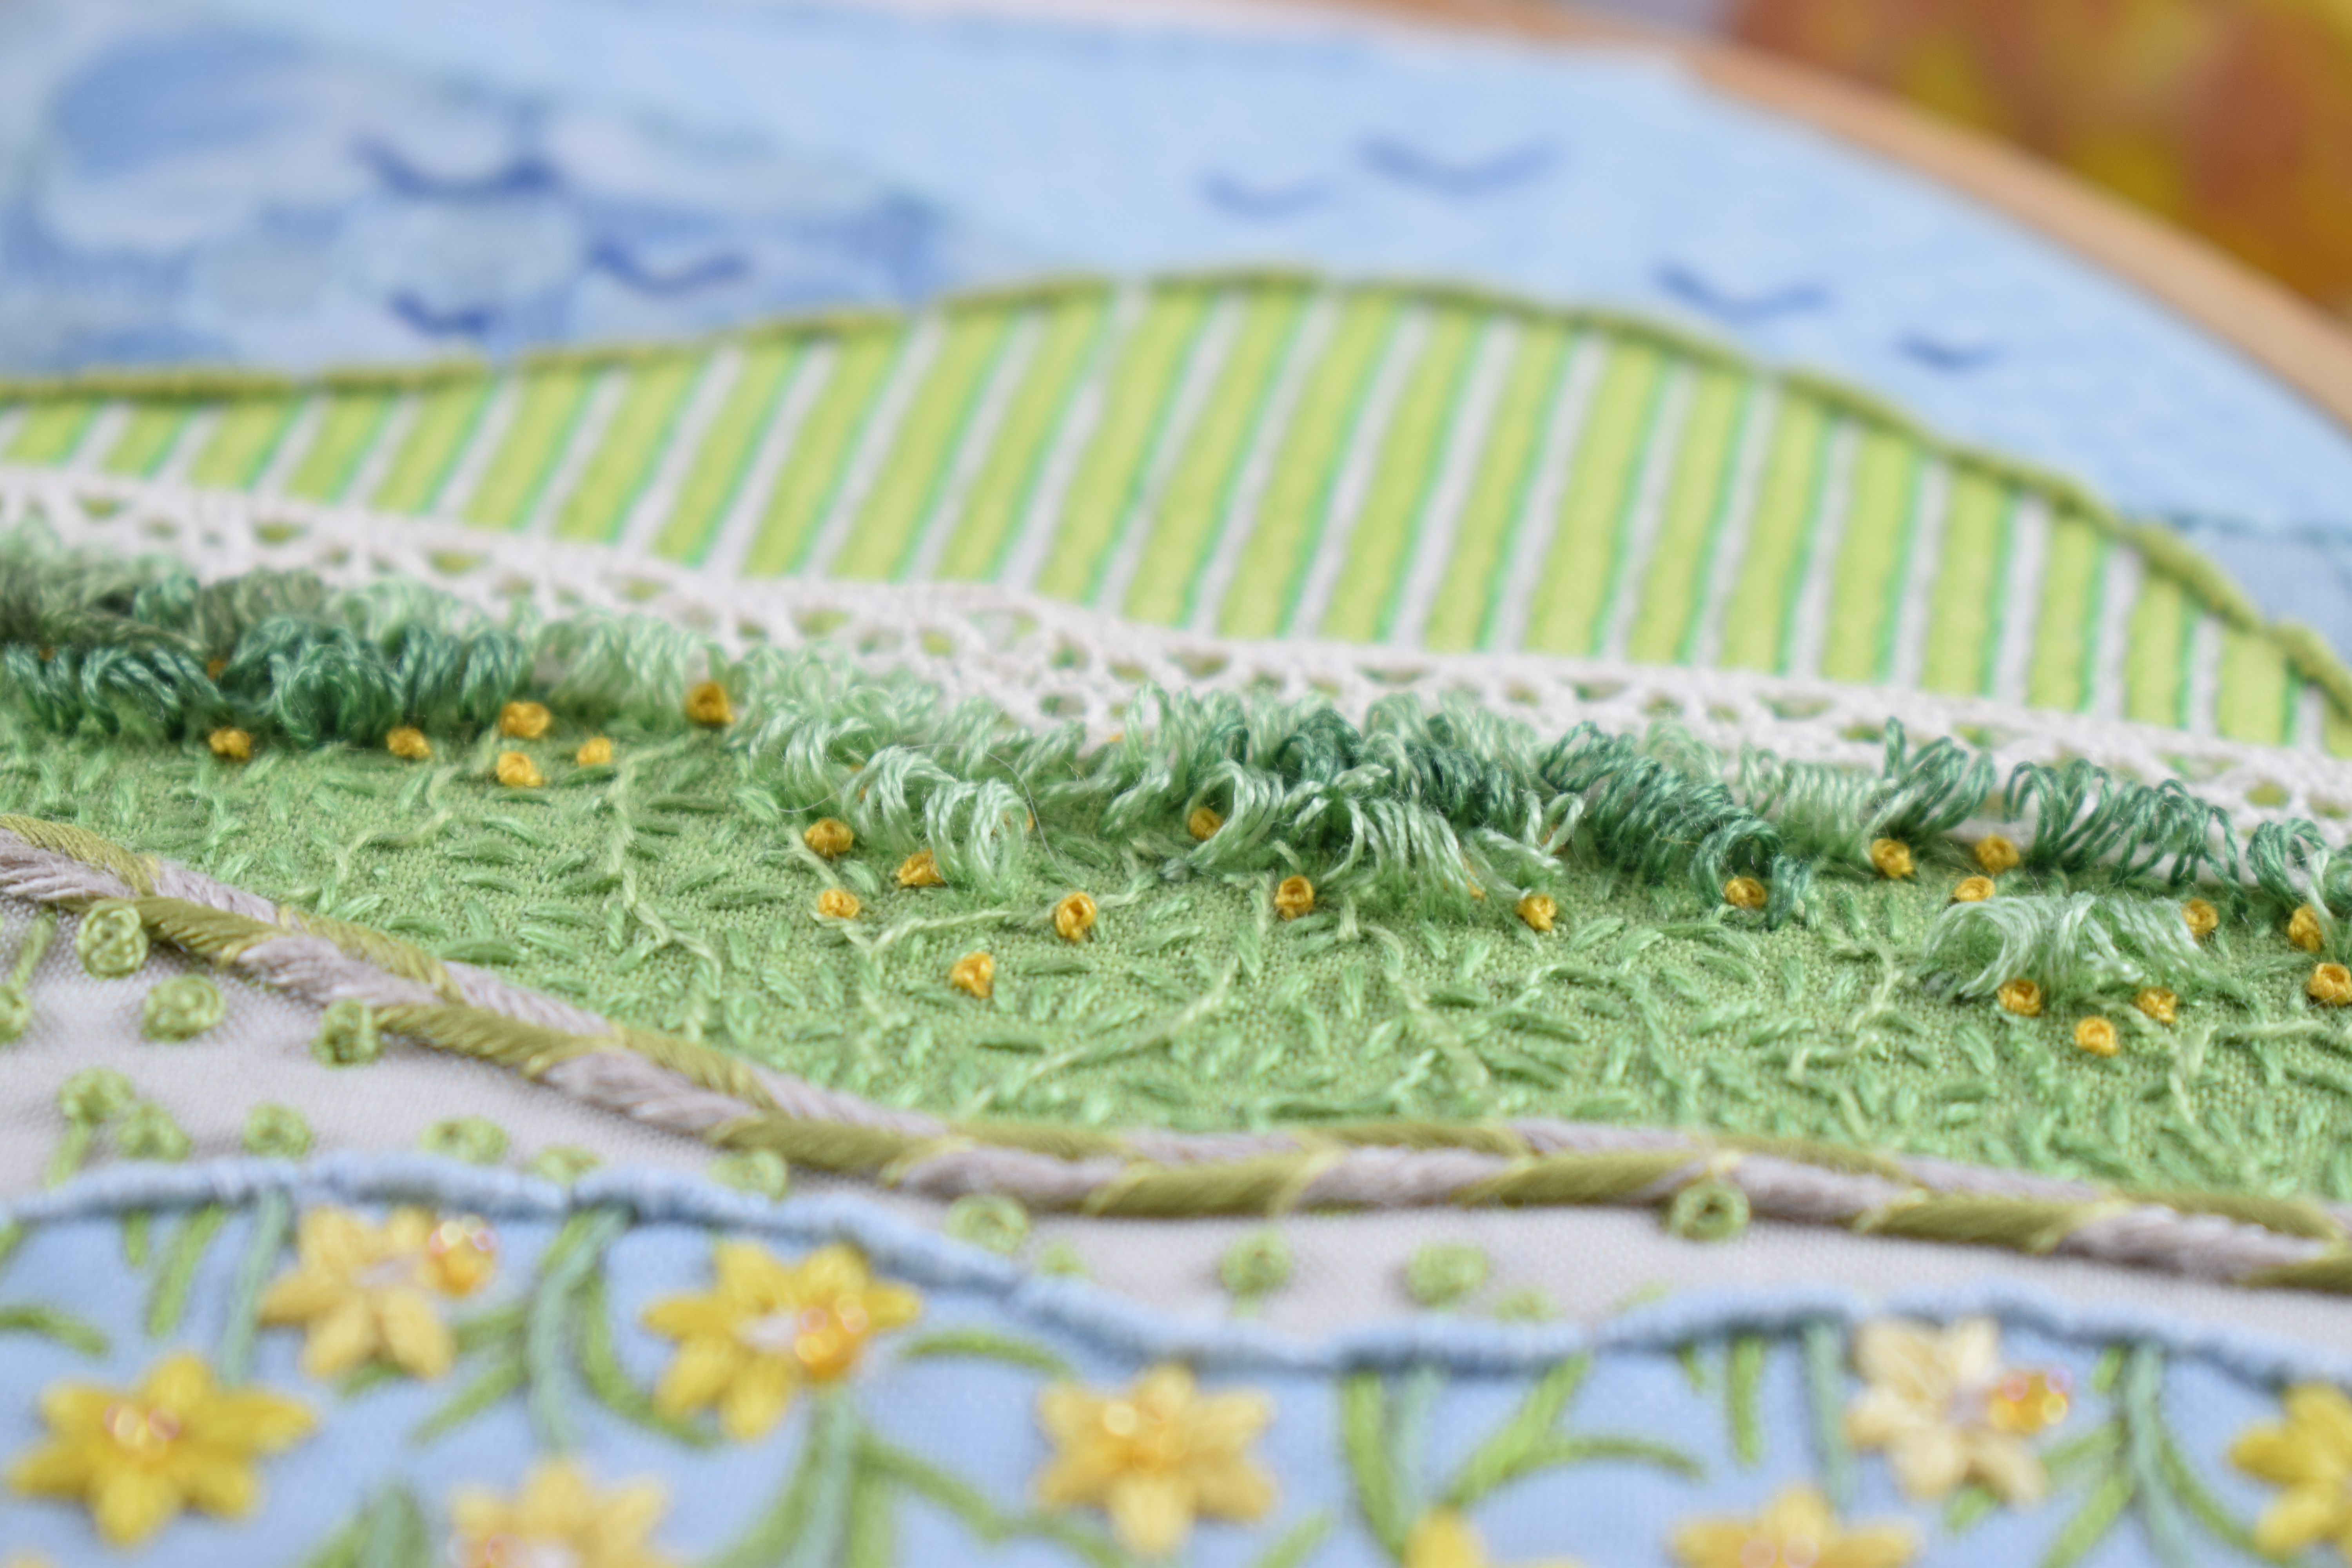
The blue layer above it, and the start of the whole inspiration, has been really simply treated with white french knots in the smaller spots (using different numbers of twists depending on the size of the spot) and a little shiny white seed bead in the bigger spots. Some spots are so big the bead doesn't cover the space which is absolutely fine, it just lends a sparkle to what's already there. 

The ric rac at the top of this layer is really lovely! It's unusual for me to put such a heavy trimming at the top of a hoop because it makes the sky look heavy - which is exactly why I put it there! Not only does it go really well with the dark blue fabric above, but it helps to make the sky look darker and heavier and more oppressive, laden as it is with snow!


The dark blue layer was initially just going to be rows of running stitch in a single strand, but I've used that so often in the last few Stitchscapes I was worried you would all start to think I was a one trick pony, so I've tried mixing it up a little bit, whipping along some of the running stitch rows to form solid lines. I haven't done this for all of the rows because I liked the texture it had created - and I think it helps to break it up a bit, as does the tiny little single strand, two twist white french knots I've added as an afterthought to start the snow's journey down to the ground. 

I went back to the stems after finishing off the rest of the layers, adding in two more clusters of folded craft stamens, and going mad with the beads! This is another area that just kind of developed as I'd started with a mix of white tube and seed beads, but the white on white on white just wasn't really doing it for me so I found some lovely dark beads in my collection, as well as two different sizes of clear beads to add sparkle and ice but not necessarily any more colour. Tiny french knots were added into the pile to make it look like the stems were growing out of a jumble of frozen soil and pebbles. 

It's really nice to have the same beads 'falling' from the sky as well as scattered on the ground. I often say about colour balancing through a hoop (eg; if you've got yellow at the bottom, try bringing yellow up to the mid ground in some way, or as I've done here, darker beads at the bottom to balance the colour of the sky) but I don't think I've balanced beads before!


So there we have it, a lovely frosty, snowy piece for you! The stitches used in this are all very simple; french knots, whip stitch (over running stitch & seed stitch), beading, couching, bullion knots, back stitch, fly stitch and seed stitch. It's often not about the stitches themselves, it's about how you use them!


Friday 5 February 2021

Daffodil Stitchscape

I started this Stitchscape in August last year, as part of a video demonstration on choosing fabrics and layering techniques. (You can see the video on my Youtube channel, here.) Since then it, and another piece I put together in the same video, have been loitering around occasionally being used as example pieces in workshops - when we were allowed them - but I felt that as I'm on such a stitching roll at the moment that it was time to actually stitch these ones and give them their finishing touch!


It's a good time of year to be stitching cheerful Daffodils, especially when it's often so grey and gloomy outside. We have actually had two Daffodils flowering in the garden since early January, although they appear to be the only ones brave enough this early in the year, all of the other Daffs are firmly green and shoot-like. 


The top layer of the 'scape is nice and easy, a single strand of running stitch worked in rows following the curves of the fabrics below and topped with a row of bullion knots. The gorgeous Bumbleberries fabric (from Lewis & Irene) has had each little obvious circle in the print gone round with a single strand of back stitch, and then some of the darker areas shaded with a different thread colour just using straight stitches. I think that this works better if the directions of the stitches go in different directions, it's amazing how different stitches can look depending on which way they go. If they all go in the same alignment then the light catches the thread the same (subtle though it is), but if you go in different directions the light behaves differently so the threads appear slightly a different shade each time. Can you see what I mean?
This layer has been topped using some of the leftover embroidery threads, couching them together over the edge to hide those slightly frayed edges. 


The green stripy layer has had single strand rows of back stitch worked up each line. The darker green colour is following a skinny line now hidden by the thread and the lighter green edges that thicker block of colour. Again this has been edged with bullion knots to finish - a fantastic technique to use on edging as they hide lots of frayed edges and have a character and texture all of their own. (If you are having trouble with bullion knots or don't know where to begin, try having a read through my bullion knot trouble shooter.)


For the plain green, I started with just the two stranded seed stitches covering the whole layer but it looked a bit odd and stark, especially with the hard straight edge of the lace I'd stitched down previously. To make it a bit more interesting I tried using my vertical whip stitch technique, which is actually in two colours as I ran out of one colour part way through using up odd ends. It still looked flat and boring so I moved on to the other layers whilst I pondered on what to do (a great tip if you're stuck or bored with one layer, move on to another and come back later when your subconscious has sorted things out for you) and later returned with the idea for the moss stitch (the loop stitches). These were worked over a stick from one of those oil diffusers so that they are all a uniform size. You do have to be slightly careful with using a stick like this otherwise you get too straight an edge and it doesn't look natural (also don't wrap the thread too tightly or you won't be able to pull the stick out afterwards!). I have tried overlapping different rows and also different colours to make it look more 'bushy'.
Little yellow french knots have been added to bring the yellow further up into the hoop and hint at Daffodils further afield. 


I think this grey/green layer is the one I like the least. Something doesn't quite gel with me (which could possibly be the harsh lines of the matching trimming?, or maybe just the grey colouring?) but as I can't think of any way to rectify it I decided to leave it as it was. The pattern underneath these stitches is exactly the same and I considered using pistil stitches which are a perfect match to the shapes, but sometimes the lines come out a bit wiggly so I instead plumped for straight stitches and a french knot on either end. 


The Daffodils took ages to do! And really hurt my fingers at the top of the layer where it overlaps several fabrics. I used three strands to make the petals quite plump looking and went over and over each petal to build up a three dimensional feel. The fabric pattern has each Daffodil the same colour but I've added a bit of artistic license and used three different colours of yellow in total. 
The trumpet centres have been gone over in the same technique but in ecru, with a little bead stitched onto the trumpet ends or at the centre where the flower is facing directly at you, to give the impression of it popping out of the hoop. 
The stems are whipped back stitch and the leaves have had a single strand of straight stitch going from end to end - although I have 'bent' them in most cases with a little couching stitch pulling the straight stitch into a curve. In most cases this isn't really visible but it really adds to the leaf effect. 


Final finishing touches are the birds in the sky which are fly stitches in dark navy, and little blue loose crosses at the bottom. 

All in all, I think this is a really sweet Spring piece and I am looking forwards to more Daffodils flowering so that I can have a little floral photoshoot with it!

The final stitch run down is; running stitch, bullion knots, back stitch, straight stitch, fly stitch, moss stitch, french knots, vertical whip stitch, whipped back stitch, beading, couching and whatever you might call the petal stitches.