Thursday 31 October 2024

Polegate Stitch Ups Christmas


Festive stitching has begun! I don't actually have that many Christmas workshops lined up for this year; there is another hoop one for Made & Making in November, and a NEW Christmas card one being organised at Juicy Lemons in December but I think that's it. I've also only got one Christmas craft fair to stock up for at Victoria Pavilion Arts, no other event has appealed to me and I find for the really small local ones I used to do - it's more effort than it's worth. Perhaps next year I'll feel more confident in booking some of the bigger Christmas craft events again. 


But, last week I was invited back to the Polegate Stitch Ups for some Christmas decoration making. I was only last there in October so it was nice to come back and see how the ladies had got on with their last hoop. Several were guiltily admitting that they hadn't really touched it since the workshop, but one lady had almost finished hers and brought it in to share with me! Photos of that at the bottom of this blog post. 


We were making our decorations in 10cm/4" hoops as they are quite a nice size to go on a tree, especially a bigger one with sturdy branches. I had good fun putting together the kit packs and playing around with different colour combinations. I had thought I had more dark blue/blue themed fabrics but I couldn't find them when putting the packs together so not sure what happened to those. Mainly these were grey/green or green/red so quite traditional which didn't seem to be a problem. 
The joy of these hoops is that you don't have to make them into a landscape or anything specific, you just get colours that you like and you add lots of sparkly trimmings and threads over them so that they catch the lights on the Christmas tree. 

There weren't that many ladies there at the end of the workshop to photograph as several left early and it sounded like a coach load of them had all come down with something a few days before so it ended up being a smaller group anyway, but the hoops I have managed to photograph below are so pretty!


I'm sure any tree would be proud to have one of these hanging on its branches! I have since been sent a photo of a finished Christmas hoop from one of the ladies who left at lunchtime too - the photo quality isn't great but you can still see how pretty it is. I love the little wreath at the top and the snowy scene at the bottom with those frosty trees. 


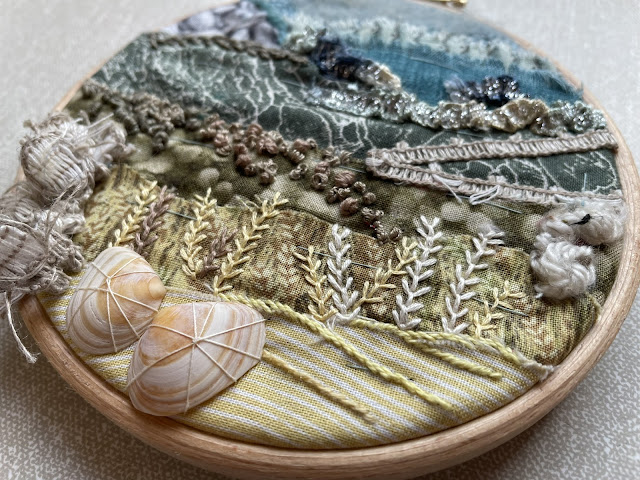
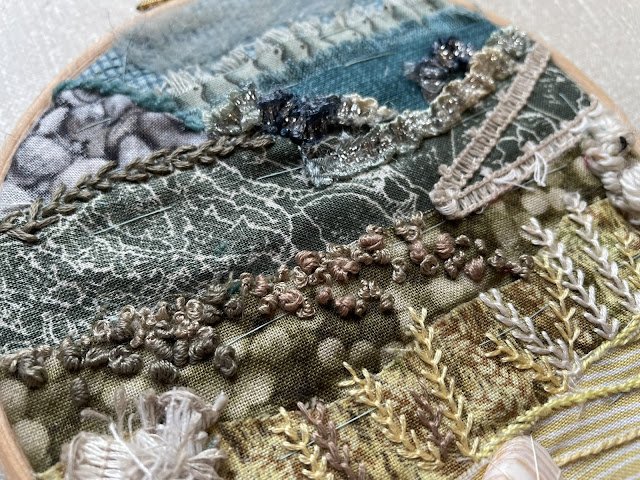
And the lady who had nearly finished her landscape hoop from the previous workshop, I feel like her name was Sue but I'm not 100% sure (sorry if you aren't a Sue, Sue), let me photograph her beautiful piece to show you all. It's such a wonderful, evocative piece with those deep colours. It looks like such a rugged, wintry beach scene with lots of rocks and crashing waves. You could almost say that same fabrics represent crashing waves or jagged rocks - it can be whatever you want it to be!


There were a few more bits she wanted to do more on by the sounds of things, and an element she wanted to take out and try again but I just think it's so lovely already! The colours work so beautifully together and there's a lot of fabulous texture. Eee so exciting to see finished (almost finished) pieces!

Kits & Workshops


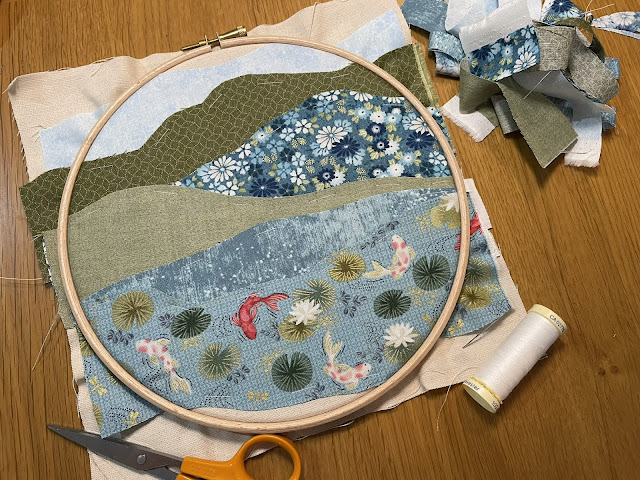
I used my newly acquired first week of being a work from home person whose son was at nursery to start on my Kasumi Koi kit! The fabrics for this arrived ages ago but it just never made it out of the packaging, other than once to oogle the fabrics and gasp over the shininess and printed gold lines.

I kept putting it off because I needed serious concentration time and had to be in the right headspace, which just so happened to come along a couple of weeks ago! 


The Kasumi Koi kit is made up of only Makower printed fabrics and it's such a gamble to see if these fabrics will work together as some of them were only printed pictures in a promotional booklet I was shown so, to try and match these with the samples was a little bit of a guessing game. It was fun to have a pre-order though and know that they were going to arrive with me before it was all released to the public. 


I had initially been going to make this in a 15cm/6" hoop but, when playing around with the hoops and the fish in particular, the size would only allow for about one fish per pond. I didn't like the idea of a lonely, sad koi fish stuck all alone in his fancy golden pond so I have scaled this up to a 20cm/8" hoop (the same size as the Harvest Sun kit) which then allows for three or four fish per hoop depending on the piece you get. I will likely have to allow for a much bigger piece than each kit needs so that there is a chance for everyone to fussy cut around the sections they want and play with where the fish end up. 


I've been trying to film more reels and videos as I go through making up these hoops and, thank goodness for zoom because the table just ends up an absolute mess with bits everywhere. It's good fun though and I'm trying to get better with it all. Lighting is my current problem as our home isn't all that bright and we have very warm inside lights which distort the colours a bit.

As it happens, I haven't touched the hoop since I started it - but it is started! - I have got some lovely trimmings and yarns which match in perfectly and I will hopefully be using metallic threads as well so there will be a little bit of a sparkly situation going on. 
So, watch this space!


On another subject, I had such a lovely little private workshop in Bexhill-on-sea the other weekend. It was organised by a lady I'd met a couple of times before and who had come to a similar private workshop organised in a wonderful marquee in a back garden

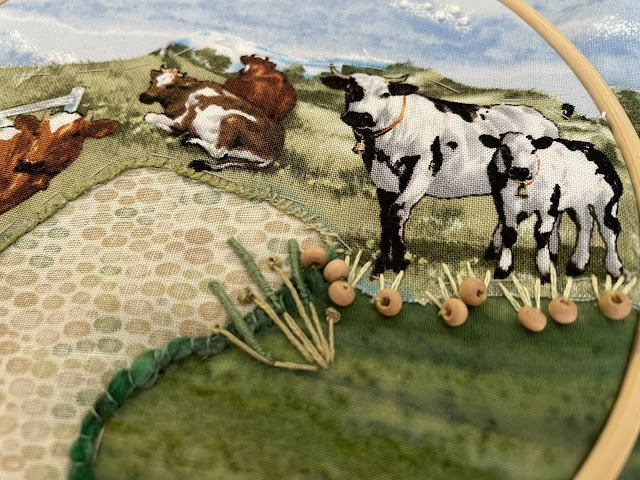
She had paid so much attention to detail in the workshop - putting together her own fabric kit packs for the ladies to choose from using fabrics from her own stash. Aren't they amazing? I love the cows especially, they work really well in terms of scale and print direction. She also had loads and loads of different threads and trimmings and beads, bead shells and all sorts of things! I had taken my scrap bag with additional threads and trimmings so there was just so much to use and draw inspiration from. 


I especially enjoy the conversations that I end up having during workshop days. Talking very seriously about requiring hardstanding for the cows and how to turn fabrics into fences or making the best kinds of grass. Taken out of context, some of the conversations would seem very strange!


Pretty much all of these ladies were stitchers - or quilters which we'll let them off for - so they didn't need all that much direction really. I was there to give ideas and to reassure when doubt struck but there wasn't a huge amount of stitch teaching going on. I think we covered drizzle stitch, bullion knots and cast-on stitch, feather stitch, fly stitch and french knots?


Mostly it's answering the question of 'what can I stitch on this bit?' 

I do enjoy that question though, it's an opportunity to think about colour and weight of line - do you mix colours in the needle at once, or use a variegated thread, perhaps you stitch an initial layer in one colour and then come back and stitch something else on top in a second colour. Perhaps it's all monotone and blends in so it doesn't shout out but adds some simple texture onto the surface. If it's far away, do you use a single strand of a stranded cotton, or do you use a big chunky perle or tapestry yarn, does it need to be fluffy or smooth.... there are so many options for each layer! 

Thursday 17 October 2024

Aurora Borealis

Do you know, in 2018 I went all the way to Iceland to see the Northern Lights - and they were rubbish! A white, barely there, mist in the sky, and a brush of green on the camera was all I came home with (obviously the holiday itself was amazing and I would love to go back, but the lights themselves were a disappointment). 

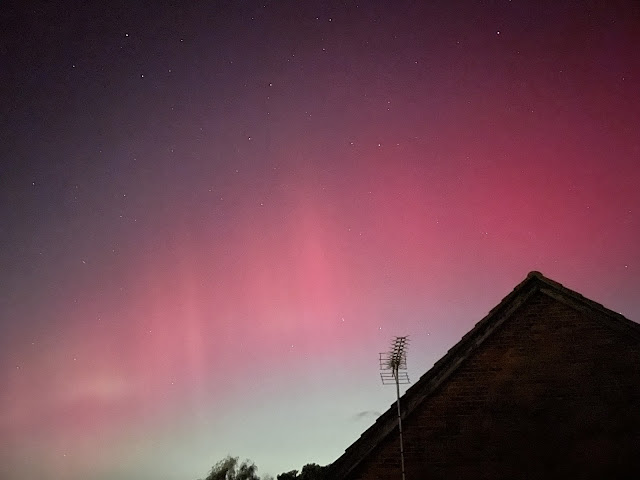
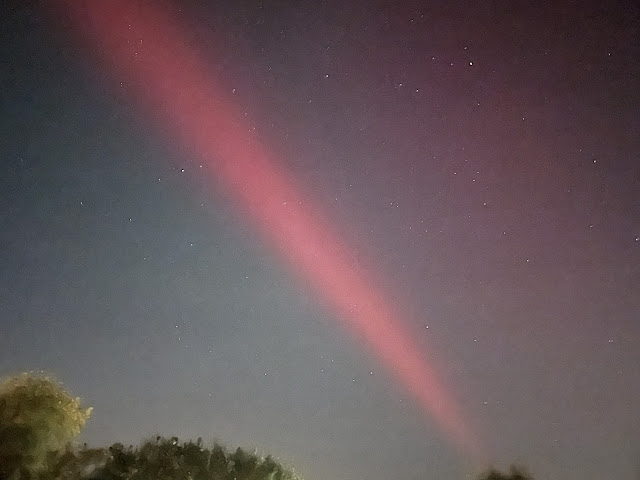
Last night (as I wrote this), I walked out of my back door at about 10pm, and was greeted with this fantastic display of bright pink in the sky! Which was actually visible to the naked eye too!! Not perhaps quite this level of pinkness, but there were definitely moving streaks of clear pink dancing around up there. I had gone outside by myself but immediately raced back inside, dragging Mr DT from his cosy spot snuggled up in bed, shoving his arms into his dressing gown and insisting he come outside with me. He wasn't quite as impressed as me (or at least pretended not to be) and didn't stay out in the cold as long, although that may have been because he didn't have shoes on and it was nippy. I even rang The Mother and got her outside her house as well!

I love the stars in these photos, they look like sprinkled fairy dust. Apparently there were quite a few shooting stars seen but I didn't see any. we are vaguely on the flight path to Gatwick airport so we did have a lot of aeroplanes circling in the distance which was quite cool through the pink haze. 


Isn't it amazing? And isn't technology amazing to be able to just snap these photos on a phone without having to change any settings at all. If they come back again I'm going to investigate what I need to do on my camera to get even clearer photos. This aurora was pink and purple, which is apparently down to nitrogen particles interacting with incoming particles. The green aurora I saw in Iceland was oxygen particles and is the more common colour to see so this is very exciting and utterly beautiful!! 


I was feeling very inspired by it the following morning and set to making my own version of the pink aurora - not that I need another project but this can be my bus project when I've finished the current one, and the Stitchscape Swap hoop I've not started yet! It was a landscape scene that needed to be immediately translated into fabric, even if the stitches don't come for a little while! 

Sunday 13 October 2024

Nether Wallop Stitchscape


I don't like to abandon Stitchscapes. There's just something about them that makes me want to keep going and trying different things on it until I think they work. This hoop started out as the first draft for the Harvest Sun Stitchscape kit but quite quickly I decided that there were things about it I wasn't happy with - and I only put forward hoops I really love as kits. 

The bits that I wasn't loving was the double use of the green abstract floral pattern (I was initially thinking that I'd try and show how you could do different techniques on them to change up the pattern) and the rows of fly stitch on the wheat field - plus the way that colour kind of stood out on its own without much balancing going on.  The fly stitch rows weren't even enough and I was struggling to make the stitch ends meet like I wanted so, if I was not happy with how I'd done a layer, then I can't ask complete stitching beginners to try the same thing!

The hoop was set aside and, as you'll see if you click on the Harvest Sun blog post here, I ended up adding in several more fabrics, increasing the layers but also balancing them better. The only thing I lost by adding in more fabrics was the space that this initial hoop had for the sun and sun rays. 


The half finished hoop sat all forlorn for several months, until I needed a new bus project and picked it up again. There is a lot less pressure when I'm stitching a hoop just for myself and I can use up odds and ends of threads without writing down the colour, or blur and blend more colours together at will. 
The sun body had already been stitched as part of the kit but I hadn't done the rays and I actually completed that part last, although I'll talk about it first I suppose. There are at least four colours used in the sun rays, mixing up one or two strands and changing the length of the stitches. I was using up some yellows I had, as well as trying to bring in yellows from other areas of the hoop - so that kind of dark golden yellow in the wheat field to help balance that a bit more. I've also added in straight stitches in a single strand of metallic gold just because it's so pretty! I haven't done that in the final Harvest Sun kit but I'm fairly sure that I've advised to go back to the sun once the rest of the layers have been stitched and add in more yellows to build it up, so if you happen to have some gold thread, by all means add that in to yours too. 


The rays ended up almost completely covering the blue fabric layer in the end so I needn't have bothered stitching it really, but it was covered with rows of single strand running stitch which you can kind of see peeking through. The lines followed the edges of the sun and the green mountains below so it had lots of swirly bits which looked like wind whooshing past. 


The left green mountain is a linen texture print so has subtle lines to look like a fabric weave in and I've accentuated these with single strand cross hatched straight stitches, working both directions at once so they interlock together. The fabric is edged with that gorgeous tiny tiny ric rac and I've stitched over it (couched) between the 'v' shapes with one direction one colour and the other direction in another colour. The thread colours are the same as those used in the fabric layer so the darker colour is the straight stitches and the lighter colour is also the french knots I've scattered across the top. (This part was for the kit so I'm limiting my colours used here.)


I very rarely plan my Stitchscapes - even for kits - and just try to see where the fabrics take me. It isn't always immediate and in this case one of the niggling feelings that this wasn't going to completely work as a kit was that I couldn't finish layers. I could fill them in with a stitch but didn't know how I was going to edge them, or vice versa. The big mountain on the right hand side I'd filled in with the straight stitches worked within the petal shadows in the pattern, but I hadn't edge it or finished it much further than that. After some thought, I added single strand running stitch around those flower shapes, used a lovely soft yarn that I happily discovered in a forgotten wool basket around the time I was working on the hoop to be the couched on edge, and popped little french knots into the centre of each flower. 

The next green layer down is the same fabric, and I was initially going to be very different in my stitching approach, but I found myself stitching the same technique but in a more matching colour to the fabric, and in two strands to make the stitches heavier. I think I could have approached this more differently and I'm not quite sure what my fingers were thinking but I've rolled with it. Alternative options would be to cover it with seed stitches and ignore the pattern, you could also then work vertical whip stitch over the seed stitches. Or I could not have done running stitch on the layer above and done rows of those instead. Anyhow, it is done and I didn't want to undo it so I've edged it with bullion knots and left it alone. 


Please don't look too closely at my wheat field. The stitching really is very bad. It started out beautifully on the right hand side with the wider area, curving the line to follow the shape of the hoop, but the more rows I worked, the more it all kind of fell apart - if I had drawn it out first it would have been a lot better but I was free-handing it and wasn't careful enough with my spacing. The narrowing shape and the curve also didn't help but I persevered, covered my raggedy fabric edge with french knots in the same colour and added two twist french knots in red to be my poppies. 


For my lovely little floral ditsy print on green, I've worked whipped back stitch along the long winding stems, a single straight stitch in each leaf and then straight stitches in the daisy petals and a big yellow french knot in the centre. The two green threads I've used were also then put together and couched along the edging to finish the layer. 


The bottom daisy layer I don't like as much as my second attempt I don't think. I've used two strands of stranded cotton and alternated the daisies to either be white or pale blue (to balance the sky), making detached chain stitches over the pattern of the petals themselves. Where I've got the really tiny daisies, I used a silvery blue colour to fill in the petals with a couple of straight stitches - not quite enough to be a satin stitch - so they looked a bit more bud-like. The yellow french knot centres are also a slightly different yellow, lighter yellow on the blue and darker on white. 

Around those I've taken more of the fluffy yarn I found to edge that top mountain, folded it and stitched it into grassy clumps, then added pistil stitches over the top to tame the wildness somewhat. Dark green tapestry yarn was added at the bottom in chunky french knots to give it more of a ground surface, and then beads added to help balance the slight sparkle of the metallic sun. 

My total stitch run down for this Harvest Sun reject - now called Nether Wallop because I really like that village name! - is; bullion knots, straight stitch, running stitch, seed stitch, french knots, couching, fly stitch, whipped back stitch, pistil stitch, detached chain stitch and beading.


So I'd love to know if you agreed with my stopping and starting again. Are there parts of the first version that you prefer over the second?


If I were to do a third version (which is unlikely), I would probably change the shape of the second mountain so that I could have more of a sun showing as I do like the rays and the big sun on the first design. I do prefer the colour balancing and layering on the second though, and the thread on the daisies is much brighter with the coton a broder thread and beads. 

Saturday 12 October 2024

Made & Making Non-Autumn


It feels like ages since I was last at Made & Making! I think I was last here in April time working on seascapes and 'general' creative Stitchscapes where anything goes. It's such a lovely place to come to and I always feel a little thrill and sense of privilege at being trusted with all of the codes to get in and having the studio all to myself! Of course it's also a little scary too as, as was the case on Saturday, I can be the only tutor there all day so it's up to me to let myself in and get the lights and radio on, then it's also up to me to wash up, sweep the floors, turn everything off and lock up again! 


It was a nice compact class with six ladies in (come on gentlemen, where are you all? You can embroider too you know!), again with mixed skill levels and a mix of ages this time too which was fun. We were meant to be doing autumn themed Stitchscapes and I was expecting lots of trees, but actually things took a turn and we ended up with barely any trees at all - and the colours don't look overly autumnal but I suppose even at the beginning stages of autumn the colours may not have yet turned. 

I love the bold colours of the sunset in the above hoop. Her final vision is to turn that semi circle of dark grey felt into a shadowed tree silhouette and have embroidered leaves coming down over her piece, pushing those bright colours to the back which will be really bold and interesting. We chatted about using long lines of wavy fly stitches (which would have to be worked upside down in this case) and alternating between black and grey colour threads for the different fronds to give an element of light and dark - especially as the darkest felt I had with me was the charcoal grey so to have only black leaves might seem a little strange. 


She had come with her daughter who is currently studying textiles at secondary school and who created the hoop above. Both of them left a little early as they had reached a good stopping point so I didn't manage to grab a photo of what they'd achieved by the end - these images are both from the halfway, lunchtime stop. 
I can tell you that the daughter's hoop ended up with embroidered rain in it which was really cool! I'm not entirely sure that she enjoyed herself as much as she thought she was going to. It's a funny one; I also studied textiles at school, college and university and 'textiles' is not the same as hand embroidery. I think she had assumed that it would all happen for her and be amazing but then she struggled a little with some french knots worked up right near to the hoop and after that she almost lost a bit of her oomph and became slightly nonchalant. 
Actually, what she created was absolutely fab. No one has stitched raindrops into a Stitchscape before to my knowledge and it looked brilliant! Her confidence had been a bit knocked though and we couldn't bring it back to what it had been sadly. I really hope that she carries on with her hoop at home and makes it so that she is pleased with it, rather than being worried about what others think (not that that is easy to do for a teenage girl, I've been there!). 


We had lots of fun with trimmings in this workshop though. I had stocked up with some more unusual ones from the-stitchery in Lewes and there were narrow decorative ribbons, wonky ric racs, rosebud ric racs, mini pom poms, waxed cotton cords and all sorts of things. The rosebud ric rac was really popular and also exactly the right colours to fit in with the chosen fabrics so I'm pleased I grabbed some of that (I kept a little bit of the blue/green colour for myself too). Look how beautifully it goes with the blue brushed cotton in the hoop below, and the floral ditsy in the hoop beneath that, then the navy and burgundy version with the colours of the fabrics in the hoop below that!


The lovely lady who stitched the hoop above was called Liz, and she remarked to me what an amazing difference the embroidery does actually make to the fabrics. Her plain green fabric behind her trees is just that, boring and plain (but a lovely olive colour), but now that she's started to add seed stitch to it and those gorgeous little french knots, it's turned it into a whole other world! The seed stitches cast little shadows and dimples, even though they've been colour matched so they don't stand out in a shouty way. It just gives it life!

The hoop below was inspired by an offcut of a dress that Rebecca brought in with her. It looks like a hem that's been cut off so the fabric itself is folded which was good because it's a fairly thin devoré so where there isn't the velvet pattern, it's much more see through and needed that extra thickness. The colours are lovely though and we've picked out the yellow tones of the leaves with the yellow ditsy floral, but then if you move the velvet fabric, where it catches the light there are other purpley/mauve colours which have gone into the sky. Each time you move the hoop the colours slightly change which is beautiful. The cream lace helps to balance everything with the white background of the top leaf print fabric and the white in the daisies at the bottom. 


The lady who created the hoop below, Paula, was very interesting to talk to. She currently has some extra time on her hands and has been doing all sorts of different creative courses which sound wonderful; screen printing, watercolour painting, textile art in various forms. She is waiting for a legal leases and other bits to complete on a gallery space that she is opening up in Brighton, Kemp Town, which will be called Pretty Neat Gallery, selling seconds, misprints and imperfect artist prints or makes which they wouldn't otherwise sell as 'best'. Sometimes accidents make the best pieces because they can come with stories, be totally unique or be the spark of inspiration for a follow up piece.

For her Stitchscape she was using the felts to create different textures and depths, contrasting them against her cotton fabrics which is lovely. I like how she has left so much calico at the top for the sky as well. Shine out bright calico!

So, these hoops may not be the autumn hoops I'd thought we'd end up with at the end of the day, but they sure are pretty, and unique to everyone.