Thursday, 15 June 2023

Amazing Cow Parsley

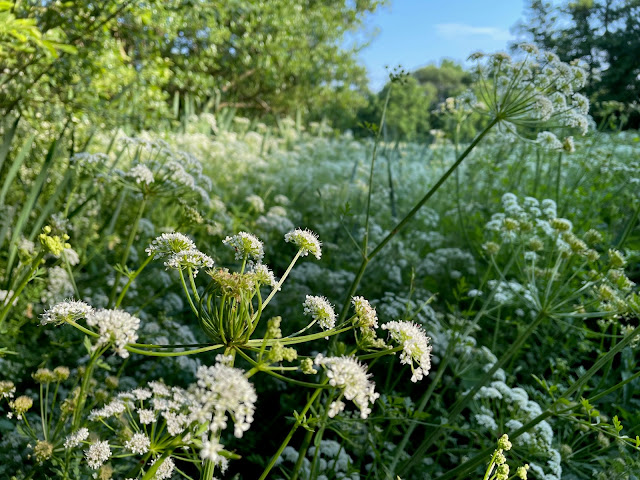
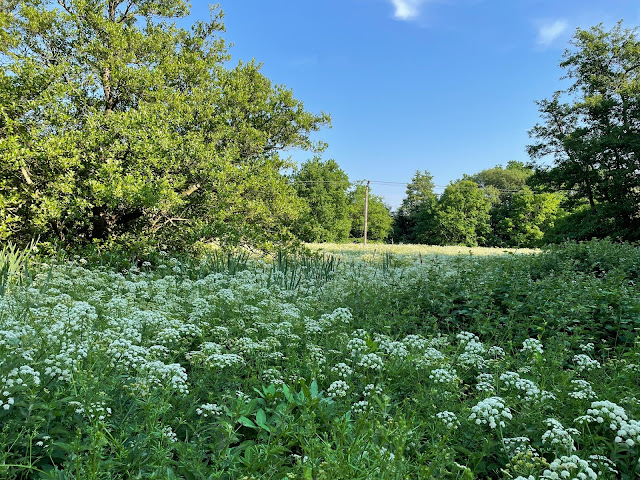
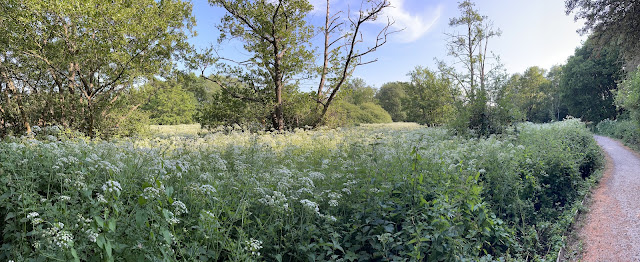
Can you take too many photos of a landscape? I was absolutely blown away on Monday walking through a local nature reserve which was absolutely stuffed to the gills with Cow Parsley! I usually get a lift back to The Parents' house from Rainbows (I'm a leader with the local unit) but I unexpectedly needed to walk back this week instead and I'm so pleased I did because this wonderful display greeted me. 

This land is a nature reserve and also a flood plain for the River Uck where it runs through the town so it's usually fairly boggy and through it is a raised walkway for people to trundle along without wading through the swamp. The path is flanked with lots of trees casting shade and it stretches right back until it hits a railway line so you really feel enclosed in it even though you are actually only metres from houses and the town centre. 


I've walked through here hundreds of times to get to the Guide hut, but I've never seen so much Cow Parsley here before. It was honestly breath taking. Every corner or twist in the path I rounded there was another view of this seemingly endless landscape - many of the stems taller than me!


Last time I came across such an amazing display I ended up creating my Cow Parsley Stitchscape, and you can see the blog post about that one here if you are interested. They're very pretty plants and they were absolutely alive with bees and other buzzing insects. 


A happy little me! This photo was to try and show you how tall some of these plants were. I'm 5ft 4" and I was standing on a raised path! I also really need a haircut. 


There are different sections as you walk through the reserve. If you start from the town end you walk through a gate and into a field with long grasses that dogs seem to love, then into a slightly more secluded pathway which cracks and crumbles like how I imagine the surface of the Moon to look. It's a great texture and I've definitely got some crackle print fabrics that would work with this. Finally you end up going over a little bridge and into the raised pathway/Cow Parsley extraordinaire section for a while before popping out into another field at the other end, at the top of which is our Guide hut. 

I'll have to try walking through here again to keep an eye on the seasonal changes. 


Wednesday, 14 June 2023

Evening Waterlilies


I'm spending more and more of my time out on the balcony in the evenings. There's a sweet spot of time where it's not as hot and, actually, being outside is cooler and fresher than inside our flat! 
I'm behind on working on these waterlily ATCs. The full theme is Waterlily Pond and I hadn't at all intended mine to resemble Monet's Water Lilies, although now I'm closer to finishing I suppose that's kind of what it looks like - aside from the Willow tree tumbling down in front which I don't think he has in the painting. 


I'm really chuffed with the trees actually, I didn't like them initially and, to be truthfully honest, I'm still not all that keen on my bridges! But I didn't have another idea of how to make them so I've stuck with it in the hopes that they will grow on me. The willow though, I feel is a success! I've used a jute twine which I think I purchased as part of a hand dyed bundle of goodies, stripped it and untwisted it so that one or two whole strands became seven or eight branches and couched down those strands in an as tree-like higgledy-piggledy fashion as I could. Over the top of the strands I've then made lots of individual fly stitches to resemble the leaves, varying their size and angle, and also mixing up a couple of colours through the whole tree. It's quite fibrous so there are strands and flakes all over the place but I quite like it. It gives me that waterfall feeling that the weeping willow tree has, dipping its leaves into the waters below. 


The two bottom fabrics I think look like water lilies already so I'm not planning on adding much to them really. Some pads have been picked out in felt and I've stitched them down, and I'm just adding chain stitch flowers over the top in pinks (maybe yellows?), then I might fill in some of the other pad shapes with a satin stitch. 


Something does need to happen to these bridges though. It doesn't look quite natural and I'm slightly at a loss of what to do to make them more loveable. I'll ponder on it in the evening sunshine!

Monday, 12 June 2023

Travelling Shells


It's so easy to start many projects. Having an idea and starting a hoop can be done quickly when you have as much practice (and as big a fabric stash) as me, and it's often the follow through that can be tedious. 
Helping others to start their own hoops and being in a class full of creative ladies helps to fill my head with ideas as well and, as I'm usually wandering around the room demonstrating stitches and chatting through ideas or discussing the lack of artistic subjects and recognition in schools (a big topic close to my heart), I don't often get a chance to sit and stitch myself when I'm in that creative zone. 
This particular piece was started as an example demonstrative hoop for the Rye Stitchers workshop a couple of weeks back and I was inspired by their use of the trimmings and interest in some of the stitches I was showing them. 
 

Because it's only a 12cm/5" hoop, it was a perfect size for the bus, and also to grab when I was out and about or, as the evenings have been getting longer and warmer, sitting out on the balcony watching the sun go down. 
I wanted lots of texture in this piece, for it to really explode out of the hoop and make your fingers itch to touch it and see what it feels like or what things are made out of. That's the joy of textiles, they feel so good to be touched. For the rockpool-esque section at the bottom I've got raffia, Stylecraft Moonbeam yarn (the knitted tube that works so well with its shiny and matte sections), stitched bullion knot barnacles, drizzle stitch in green for seaweed...and then at the-stitchery in Lewes I came across some faux suede type fringe trimmings which looked interesting. 
Always raid the furnishing section or fringing sections when going through a haberdashery, you never know what you'll find! 


The fringing looked like the below image when I picked it up, I actually got it in two colours but I think this lighter one works better for this piece. The length and width of each strand was completely wrong for anemones or scrubby little beachy plants but it had a lot of potential. 


I started by cutting the length down to something more manageable, about half way really, then divided the strands into three. It turns out that this stuff was really easy to cut through because it's so thin and synthetic, based on a woven fabric perhaps with some kind of fluffy bonding on either side so that it doesn't fray? (I did dispose of the pieces I cut off but actually you could save those to use in other projects to become driftwood or fence posts or something.)


The bottom band I also trimmed down a little as it was too tall, and then folded in half so that the band was on the inside when I rolled the fringe up into a little mad tube. I stitched around and over the band all of the way around so that it would stand up and they just look so fantastic!! The length is still a little too long and wild but there is such a lot of character and it really adds something eye catching to this hoop, a total contrast from the smoothness of the shells. 


One of course wasn't enough so I ended up with three of them, happily waving around in the golden evening sunshine. 


This piece isn't quite finished yet, still more to add to the bottom to make it a little bit shiny so I will write up another blog post for you with a run down of all of the stitches and different layers. I think the message in this post is to see what happens when you destroy things!! Try to look past how they present themselves to you on the shelf in a shop and see their potential to be other things. Most people probably have looked at this fringe and thought of upcycling bags, hats, boots or jackets to become cowboy/girl accessories, perhaps it's only me that looked at it and thought 'sea urchins'! What would you have thought of?

Friday, 9 June 2023

May On The Edge Of The Cliff ATC Swap


What a lovely little swap theme this has been. The diversity, as always, is there with the interpretations of the themes; Puffins (both absolutely gorgeous!), cliffs, beach huts, lighthouses, tree swings, bird colonies, sediment layers... Just lovely. 

One of my favourite parts of this swap as a whole is that the ladies (sadly no men!! Come on chaps!) participating come from all over England and cover several counties. These ladies, as far as I know, have never met, yet they are united through this swap in sharing creative ideas and starting a postal conversation with the cards and occasionally on social media. I choose who gets a card from who, but everyone gets a card from someone new each time so it's more a case of working out who they haven't had a card from yet. 

Personally, I love building a collection of art with so much time, skill and thought put into it - if you were to purchase these cards at an exhibition or fair they should rightly cost you a lot of money and yet this mutual sharing of art costs no more than postage, envelopes and your own materials. I feel privileged that the participants are so willing to give up their time and artwork in this way with the rest of us. 


I'm disappointed in my photography of these cards, I'm afraid I was taking photos late on Monday night as the sun was going down and I thought that the evening sun would be enough but I think the slightly lower light with the paler cards and black balcony floor made for a tricky combination so they're a tad over-exposed which does not at all do the cards justice!


It's interesting how many of the cards look very similar. Having just said that the ladies have never met, and all they've had to go on is the theme title, and the couple of inspiration points I write for anyone who gets stuck, the two bottom right cards are very very similar in composition, just different personal styles, then the three middle cards are also quite similar with how they've been set out - although the one on the very right was more about the sediment layers and textures within cliffs so the focus is different in each one. Then of course there are two Puffins! Out of all of the sea birds. Aren't they lovely? So characterful. 


I love the interpretation above of the seabirds and their nests on the cliffs. Sitting birds on ledges as french knots and the diving and swooping birds looking like little arrows or bullets swooshing around next to the cliff. According to the back of the card, this is based on Bempton Cliffs RSPB Seabird Colony and, having had a quick google, it's very realistic! I've linked to it above if you are interested in having a look for yourself. 

This one is full of movement, don't you think? If it were a painting it would be quick slashes and splashes of paint with a loose movement to give the impression of crashing waves and rolling sea. I don't know you can make loose splashes of thread when you're stitching but the stitches themselves aren't pulled tight and they roll and move around each other with that slight looseness so you do get that movement, it's really wonderful. 

The textures in these sediment layers are also really lovely and this was very textural to the touch. I like how the different fibres have different widths and lustre, such an innovative way to add in the different colours in cliffs.

I think, although I'm not fully sure, that this amazing white cliff ATC is fully made with split stitch? The entire canvas is covered and there are so many colours in it!

I'll stop rambling and let you work through the rest of the cards yourself. Each one has so many different elements to it that you spot a new thing each time! What are your thoughts on this theme?


Jacquie's lighthouse below is the final card in the collection and the lighthouse motif was a cross stitch kit that spiked inspiration and got included in the card itself! It's interesting because I come across lots of people at shows and events, several of whom inform me that they "do embroidery, but they only do cross stitch". It implies that cross stitch is either on another level, or that it is a different medium that cannot be tampered with. I think in this case, combining a cross stitch piece with layered textures and machine stitch serves as a reminder that there is absolutely nothing stopping you from combining techniques and having a play!