Showing posts with label Art Foundation. Show all posts

Saturday, 28 May 2011

Finished!!!

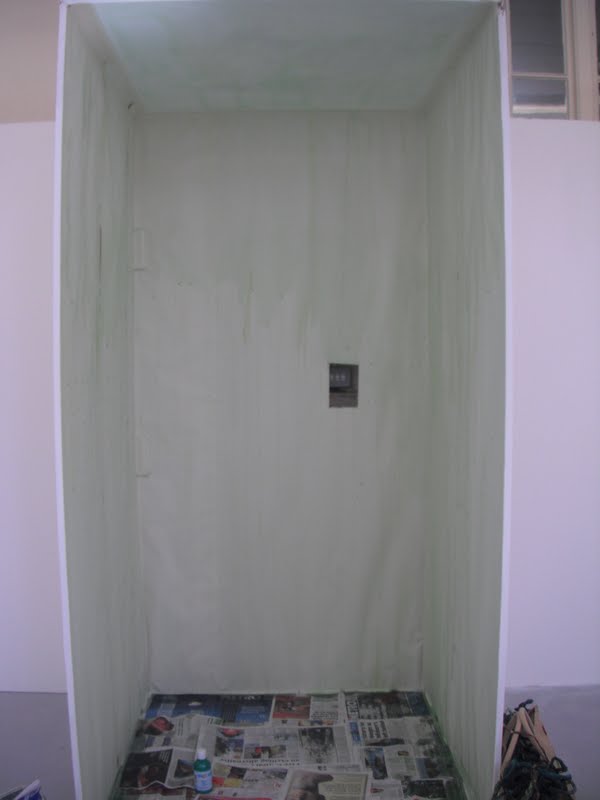
Yay!! I have finally finished putting up this exhibition!! Thank goodness for that! Took ages to put it all together and I kept running out of things like wallpaper which was incredibly annoying- here is a brief flick through of how it all went up!

 (Painted white)                                            (Half wallpapered)

                         (Completely wallpapered)                                    (Painted green)

(Darker green drips flicked on)

There were a few difficulties when wallpapering as in the left hand corner are two little blocks sticking out which had to be individually papered and then cut round with the long sheet of paper- took ages and lots of beating the paper to get it to go right. Then there is the hole for the light switch access which had to be wallpapered around as well!

I did have it all up on Thursday but I really hated it! It looked awful in my opinion! Here is what it looked like then:

 
I didn't like the placement of the 'curtain' which was originally much taller until I started attacking it to get nice loops and textures. Also the string holding up the vines was not very aesthetic. Added to that I wasn't sure about the colour of the walls and the fact that the rug is much shallower than the size of the box!

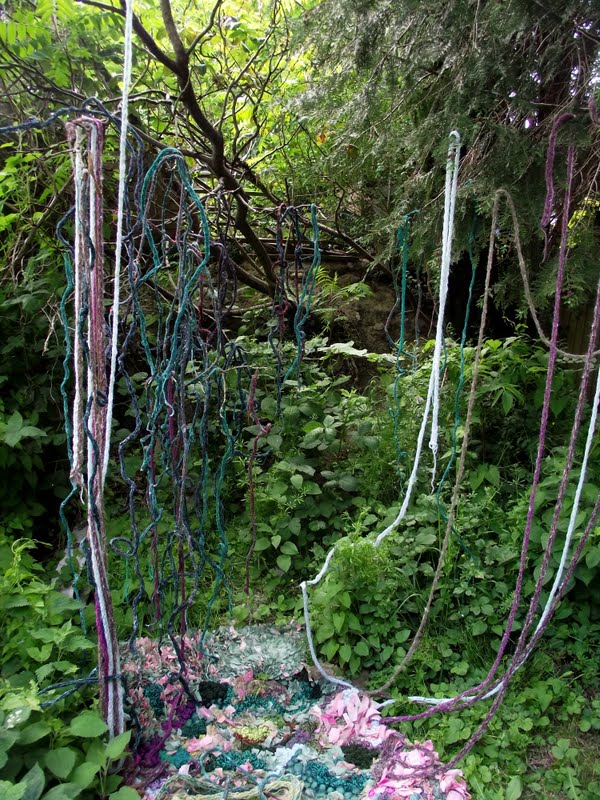
Still, all was not lost as the next day the string collapsed and it all fell down. Instead, I have individually stapled each vine to the ceiling, moved the 'curtain' backwards so that it is in line with the rug- making the jungle appear bigger somehow- the curtain has also been stapled to the ceiling so that it is no longer hanging in mid air, and it is all looking much better! Here are a few shots of the finished installation!


Monday, 23 May 2011

An Ever Growing Jungle

Nearing the end of my FMP now- the walls are up, painted and pristine. The floors have been meticulously and back breakingly scrubbed- well in the room I was doing anyway, other rooms were allowed to just simply repaint (totally unfair!). I have my little three sided box with a roof and tomorrow I am going in to wallpaper and then repaint it green.
In the meantime, I have been hanging my vines from trees again and forcing my brother to look interested in it all. He did say some very nice things about it afterwards though, about how it 'transported him to another world, a jungley world' and how he 'felt he had to touch and explore, moving and looking at things.' He can sounds quite pompous at times, must be all the films he watches...


I think I prefer the black and white photograph of these vines, it makes you focus more on the shapes rather than the colours, and make the vines fit in more with the natural surroundings. They look almost like hanging roots dripping down the photo.


Again the black and white photo looks much better and more natural without the almost garish pink colours to distract.

 
My brother before he started getting serious and poetical...


Thursday, 19 May 2011

It's In The Bag (& Other Random Bits!)

So I'm sort of on an unofficial study leave now- they've taken away my desk and turned the room into a fabulous exhibition space...sort of. Today I have to go in and tape it all up, whatever that means, and then tomorrow we are painting it all white. The only issue I have with this, is I want my space green and I'm not sure if I can just paint the walls green or if I have to buy wallpaper and paint that.
Anyway, it means I've had to bring all my stuff home- no mean feat when your on the bus, carrying this:


Bits of waxed vine trailing everywhere, tripping people up etc. Although I did pity the man who was carrying four planks of wood on the bus- he got off in the middle of nowhere as well so I don't know what he was doing with them...
The Mother is hating having all this stuff lying around the house. If I took a photo of each downstairs room in the house there will be several bags, boxes, folders, piles of my art stuff blocking up the space. Still, as there is nowhere else to put it, it will have to stay there until someone buys me a shed to put it all in!!!

I'm feeling really nervous about putting up this installation. I mean, I haven't seen it all together, all hung up before as the space I was working in wasn't the space I'm going to have to exhibit it in- plus I hadn't finished it all by the time I had to take it down. But I don't know if I have got enough vines, whether they will hang well, if they will hang at all, how long they are etc. For me, there are just too many unknowns but all my friends say that it will work out so I will just have to trust them I think. It is hard getting the attention of the technicians or the teachers though as they are all so busy setting up the spaces or helping the fashion lot make complex outfits with bizarre pattern pieces and hidden messages.

So for now I'm just waiting for my space to be built and then I can crack on and get it all up and analyse it from various angles....what shall I do whilst I wait?!

I have just joined up for several more ATC swaps so once I have done them I can bore you with more photos of little cards. I am currently working on an embroidered Alphabet card with 'G is for Garden' on it. I'm going to do another one called 'H is for Home' and then it will be like Home and Garden...see?? No?? Never mind.

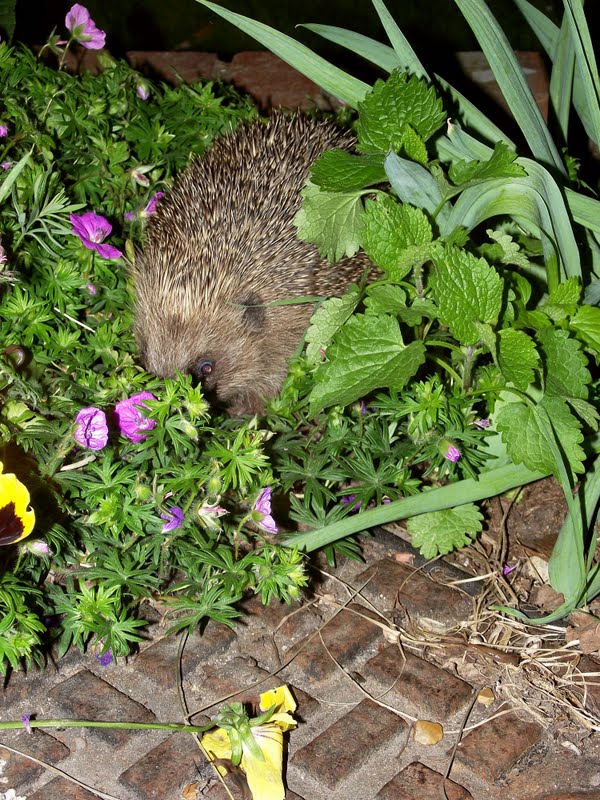
We've had a little visitor to our garden recently as well, he very obligingly posed for me whilst I took photos, although I think I may have blinded him more that he was already- the flash on my camera certainly blinded me! I had white squares in my eyes for ages after wards. Anyway, meet Hodgeheg the Hedgehog!

Monday, 16 May 2011

Waxing The Jungle

I haven't said much lately about my FMP so I thought I would let you know how it is coming along. I am in the final few weeks!!! My studio has been taken away and turned into an exhibition space so at the end of the week I have to go and do a load of taping and painting to make it look beautiful. I spent all of yesterday knitting like crazy- volunteers are welcome...I'm knitting my fingers to stumps!!!
Anyway, in the last week of studio time I was waxing lots of my knits to give them unusual textures and shapes, only issue is, it makes them a lot thinner so in my opinion I need more of them!!!


They do look less woolly though which is fantastic!


I have also been thinking about backgrounds for my jungle. The space I have consists of three walls set in a partial box shape. These will be painted white and then my jungle set within it so people can walk into it. The issue is the white walls which are just too clinical for my jungle. So I think I will buy some plain wallpaper and paint it- or maybe green paper and dribble paint over the top. Here are some of my experiments...

 
The coloured background does look better I think, and the walls don't really need texture as there will be lots inside the box to take in.

Friday, 6 May 2011

Spiky Glass Shibori

Very exciting at college today (well, an exciting moment in amongst the endless knitting!), I had knitted a square using wire, and yesterday it was put in the kiln with a sheet of glass on top! The glass obviously melted through the holes in the knitted and made really interesting shapes which do look a bit like shibori. Some of the spikes were so thin I had to snap them off or risk spiking someone as I walked past, they were also too delicate and kept waving precariously around.


It creates a lovely pattern if you hold it up to the light (this is looking at it from the other side)

Thursday, 5 May 2011

Growing a Jungle!

Growing a jungle is hard work! And I'm running out of time which is scary. (For those who haven't read previous posts, I am talking about my final major project where I have decided to try and knit a sort of jungle---which is huge!!!) Over two months seems like ages at the beginning, but now I only have two weeks or so left and I'm seriously considering hiring someone to knit for me!
I have lost count of the number of finger knits I have done- each three metre length takes half an hour, which is fine...only I need six metre lengths which is an hour and quite hard work on the hands after a while. Not only do I need these knits for the drapey bits, but I have also had to make loads for the rag rug I have made which eats up these knits like there is no tomorrow!!

The whole thing has been moved inside (from my photo shoot in the woods) so I can play around with the placement of things and see how it might look in the exhibition. It is far from finished but here is what I have so far:

 
This is before I completed my rug so a lot of these knitted vines are now in the rug- meaning I have to re-knit them all!!

 
I'm not entirely sure where to put this lovely piece of shibori, either hanging down or woven into something or creeping up the walls...decisions decisions...

 
I have done some little shibori bits and embedded them into my rag rug to add other textures and shapes. I was going to stuff them with wadding but it looked a bit off with white underneath- instead I ripped up blue roll and mashed it together with water and green paint. Then rolled it into little balls and stuffed it into the bubbles. As it has dried, it has gone quite hard which is a nice contrast to the very woolly bits of the rug. (And feels very strange to stand on!)

 
The final finished rug- the bit missing in the middle is intentional, I didn't want it to be a squared shape so just cut a bit out (meant less work as well). What you don't see in the picture is the depth of the rug. Everyone who walks past stops to knead and touch the rug, it is like working with a whole group of cats!!

Thursday, 7 April 2011

Shibori Madness

I have been going mad with shibori at the moment, experimenting with using different sized marbles, folding, securing with elastic bands and all kinds of things! For those who have no idea what shibori is, it is a Japanese term for dyeing cloth, sort of like tie-dye, using various different methods of stitching, twisting, binding etc...(click here for the Wikipedia definition).
I initially had it explained to me as a term used for any materials that are textured through the use of steam so that is what I think shibori is, but I reckon that is slightly different- if you know more then please leave a comment. :D
So I thought I would show you some before and after pictures just so you get kind of an idea of the things you can do with shibori and marbles etc.


I pre-dyed this organza, but didn't fix the colour as I was interested to see if it would run when steamed, then secured marbles into it at random points. The tighter you secure under the marbles, the more successful your end piece will be.

 
Then after steaming for about five minutes (the longest part is actually putting the marbles in!! It's all in the preparation) I let the organza dry and removed the marbles. The colour didn't really run in this sample although did shift around a bit, and some areas are now darker than they were before.

 
This one I pleated then wrapped elastic bands round to get a sort of double whammy- as I would end up with the pleats being fixed and also the tension of the bands.

 
When stretched out, this actually has really interesting zig-zag patterns in it from the elastic bands. Imagine if this was a really big piece, all pleated and beautiful!


This one began as two layers of organza, one yellow and one pink (yellow on the top which is what gives it the slightly peachy colour) with big marbles!!

 
The colour ran quite epically so that in the end only the edges of the top piece of organza was very slightly tinged with yellow, and on the top of the bubbles- where it was touching the bottom of the steamer- the colour has been steamed right out!! In this image I have stuffed the bubbles with tissue to bulk them out a bit and add a different texture.

Having experimented and deciding what I liked and what worked well, I decided to go for a big piece! Taking a 3 metre length of pre dyed organza, I secured different sized marbles and also scrunched and secured other areas to see if that would give a different texture. It didn't feel hot enough after five minutes in the steamer so I gave it another five until it was boiling hot and I burnt myself trying to pick it out (use tongs!!!). Then after it had cooled down I took out the hundreds of marbles and was left with this...


...which didn't really look that special, and the bits that I had scrunched weren't textured enough for me so I started stitching into it, adding pleats and little circles and just generally going mad with the sewing machine, until I ended up with....


...which actually is really exciting and tactile and people can't help but touch it when they walk past my desk which was the effect I was going for so that's fantastic!!!

Incidentally, I have come across quite an interesting shibori artist called Michelle Griffiths who has done the most amazing things and is well worth a look at!

Tuesday, 5 April 2011

Painted Tape

Have spent a few hours today playing around with painting masking tape and getting paint everywhere!!! The plan was to come up with a idea of hanging and twisting vines, and remembering an accidental sculpture I made earlier on in the year I thought I would have another go- it seems that wide sellotape is very different to thinner sellotape and doesn't curl up as well. Never mind...


I ended up covered in paint of course (luckily none got on my white t-shirt!!!)


Friday, 1 April 2011

Lost in the Jungle

I couldn't think of a catchy title for this post (or my FMP as this is the same title) so 'Lost In The Jungle' will have to do. :D
I have been endlessly finger knitting 3 metre lengths of knit to make 'vines'- the beginning part of my knitted jungle- if you ever feel a pressing need to do the same, sitting on the kitchen counter listening to the radio is a good way of passing the time and before you know it you have a long length of wool spilling all over the floor!
The idea behind this supposed madness is they will end up flung over trees as an outdoor installation. Here is my first attempt in my back garden...


I wasn't really sure that it had the right effect though (might be all the rubbish that has collected in the garden), so I did some more knitting and listening to the radio, then invited my friend to come and model the vines for me in a nearby wood. These photos went much better, although it was typical that as soon as I want a proper photo shoot, it rains!!! Mud everywhere! Still, it was hilariously funny and I think the end photos really get across the idea of it being an interactive installation. We were being surreptitiously watched by a couple of dog walkers who were hiding behind a bush which sort of added to the hilarity.


I also played around with using different buttons on my camera- for example, the top right image is using the chrome colour setting, definitely makes the colours brighter.

Thursday, 24 March 2011

Beginning the Final Major

Well, I did warn you that I was going to be very busy- in fact, I only have time to do this today because the teachers are striking over their pensions and the college has been shut for the day.
I have now begun my final major project!!!! It's all about rain forests and jungles, so I have been looking at images and issues concerning them, moved onto a huge colour thing (decided on my colour theme of vivid greens and 'hot colours'), done some research into artists, especially Ruth Lee who does all sorts of fab knitting and has even written a book about it! (Contemporary Knitting for Textile Artists) and am now moving onto experiments with materials and processes.
Knitting is going to be a big thing in my final piece- which I would like to be a huge walk through installation which sort of transports you to another place- although I would also like to learn how to crochet, make rag rugs, shibori and any other textile process that I might come across. Recently I have tried knitting with wire and beads which produced quite an interesting result, also circular weaving with beads, knitting with circular needles to produce a long trunk thing- an ongoing and incredibly long process, obviously I need to learn to knit faster! And also made my own knitting frame using pencils and masking tape which is going quite well I think...


My tutor Wendy said that she would show me how to use the glass kiln so I have a load of experiments for that to do- I had a snoop around the 3D room the other day, and one of the girls has done this amazing tactile piece where she has supported a square of chicken wire in the kiln, then laid a sheet of glass on the top so that it melted through the wire, producing this sort of reversed honeycomb effect. I want to do the same sort of thing but try knitting with wire first-- ooo its so exciting!!! :D