Does anyone live, or know of, Nempnett Thrubwell? Does it have sheep in it? Well it does now!
Continuing my campaign of naming Stitchscapes after random and slightly funny (but not rude) places in Britain, I recently discovered - virtually through the internet - Nempnett Thrubwell which is a small village on the edge of Bath in Somerset. Apparently, so Google says, it is around 15km South-West of Bristol, but I don't know why that in particular is relevant, nearest big town/city?
It has a population of about 177 people and, some interesting facts for you, it is the site of the Fairy Toot oval barrow (which was once huge but has now been mostly destroyed), it is apparently quite difficult to find via road mainly being comprised of isolated farmsteads and it is the subject of the song, Down in Nempnett Thrubwell, by The Wurzels and also mentioned in a song called The Clump by Adge Cutler. Now it's also the name of my Stitchscape and I hope that the residents don't mind my using their village name.
This piece changed a lot from when it first started, which I
mentioned in November in an update post about it. It began as a workshop demonstration in Bexhill in a 12cm/5" hoop, just on layering and then had some random woven wheels worked over the top of it in no particular place. I needed the hoop for something so it got un-hooped and became unloved for several weeks in the corner of a room until I found it at a point where I needed a project to work on as Baby F was poorly and I was nap-trapped a lot. When I went to put it back into a hoop, I accidentally used a 15cm/6" hoop which left big gaps at the top and bottom.
Rather than admit my mistake and go and find at 12cm hoop, the top edge I carefully unpicked and slipped an extra piece of fabric underneath to extend my sky and sunset/sunrise, and the bottom I planned to cover in rocks which are mostly just worked on the calico rather than over a cotton print fabric like I would normally have. The random woven wheels and other demonstrative stitches were removed and I could start stitching this piece properly!
It was the colours that drew me to this piece at first. The fabrics had been put together as a workshop pack but had been left by those in the workshop and there was something about the combination that spoke to me so I pilfered it back for my own uses. The purple and yellow just sing together so beautifully!
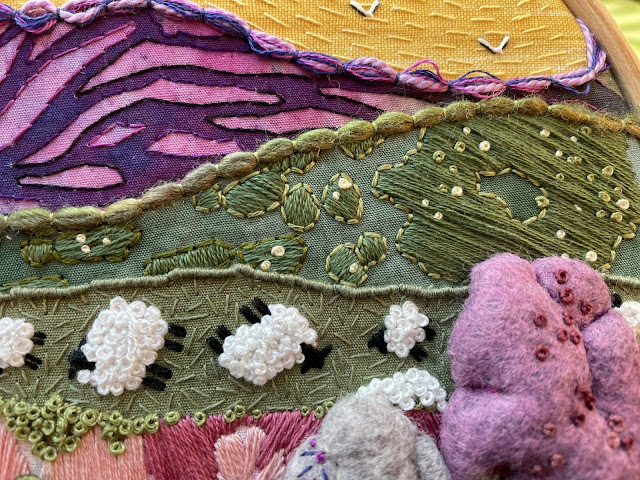
So, starting at the top you have the fabric that I snuck in that wasn't initially part of the party. The pattern is a beautiful wavy linear stripe and I've worked a single strand whipped back stitch (whip stitch over back stitch to give you a really solid line) following the line of the print. Bullion knots have been used to edge the fabric layer and my customary little kisses popped on top.
Keeping the horizontal linear look, I've then used a single strand for running stitches across the layer beneath but I've followed the outline of both the mountain layer and the top edge so that when you get to the middle of the layer there are clashes and interesting shapes drawn in thread. Small birds have been made with fly stitch in white, and shadows added with a single strand of a dark grey just straight stitched under the 'wings' to help them stand out more.
The purple batik layer (which
you can buy on my web shop, as well as the yellow fabric above actually) has been outlined around each of the stripes and shapes using single strand back stitch in a variegated thread which has worked really nicely with almost the variegation of the fabric colours themselves. It's added a different depth to some of the areas and given it quite a three dimensional appearance that it didn't really have before. To edge this fabric I've used a purple cotton perle thread (the twisted thread you can see) and several strands of a couple of embroidery threads, loosely gathering them together and then pulling them out a bit when I couched them down so that they weren't lying flat.
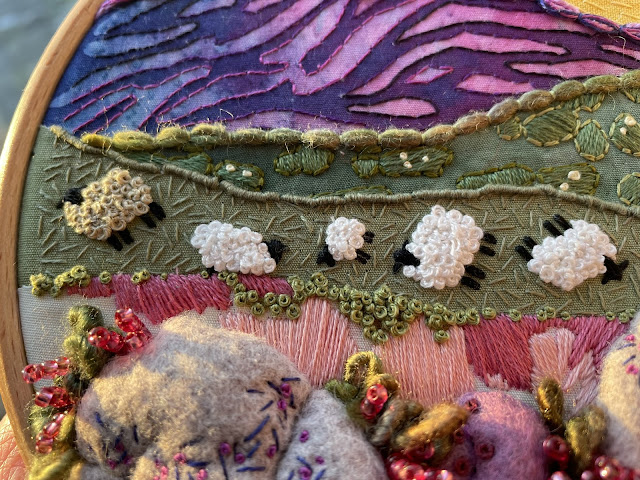
The green batik layer under that I have filled in the splodges with two strand satin stitch, alternating the direction of the stitches in each splodge so that the light catches them differently. I've gone around those splodges as well with two strand back stitch in a slightly different green, just for fun really and to tidy up the edges of the satin stitches perhaps. Tiny little french knots (one and two twist) have been added in both the edging green and also a pale yellow used in the sky to help mirror the colour. I've couched on a lovely hand-dyed wool to this edge which has flecks of both of the green colours and just finishes the layer off so nicely.
The sheep are my usual sheep, I'm not very experimental with them really. I did run out of white thread on the last sheep so he ended up being brown, and I wish that I'd placed the colour better so that he was the next sheep in from the edge to balance the colour but, perhaps he's on the edge because he's so muddy or naughty? Who knows.
Around the sheep is a single strand seed stitch to give them some grassy texture, and I've edged this layer with bullion knots as well.
The pink layer, now partially hidden by rocks, I had used because I thought it was a bit of a challenge. The pattern was a slightly wishy washy big floral chintz print and it wasn't the right scale, plus it's on a cream background which was just a tad too bright for a landscape. It was obviously waiting for this hoop though because the rocks have hidden most of the cream background, and the slice has gone right through the pink flowers so they just became areas of colour which I've coloured in with thread anyway as blocks of colour. Any areas along the edge of the fabric which weren't covered in satin stitch I've added some little green french knots, trickling them into the layer and dotting them right on the edge of the pink in some places so it almost looks like moss growing on a pink wall. Oddly, having been so reserved about using the fabric in the first place, it's now one of my favourite bits about the whole hoop!
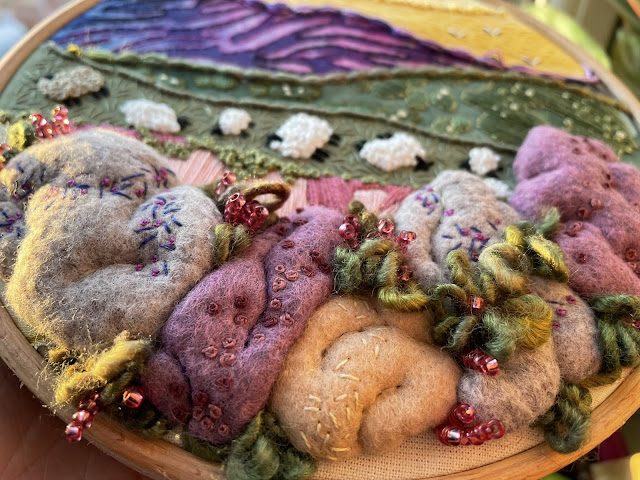
Most people have been commenting on the rocks though. My lovely felt rocks. These are all individually made, and the felt itself has come from my stash of
felt offcuts from Billow Fabrics - they do wool felt scrap packs in various sizes which are brilliant when you need just little pieces. I think I bought the smaller scrap pack which was just short of £10 and you get at least 30 pieces of felt in a HUGE range of colours! Nice colours too, not acidic or overbright.
Anyway, the rocks are just hand cut big shapes, about two thirds bigger than you want your final rock to be, with running stitch worked around the edge. This is then pulled, the formed cup stuffed with some toy stuffing, and then I tend to knot off and lace up the back a bit to help keep the stuffing in. I don't pull the whole shape closed, just until it's the right size.
Each rock is then stitched onto the hoop with little stitches coming up through the fabric, catching some of the bottom of the felt and back through the hoop again. I also stitch texture and further shaping in by back stitching (two strands) straight through the rock, the stuffing and the hoop, pulling on the thread to make it quite tight and draw in the felt.
The texture stitches on the rocks, french knots and seed stitch, are then stitched on as well, still going through the hoop, stuffing and felt but not pulling the thread so they rest gently on the top. It's such a nice way to add little nooks and crannies to the surface and additional texture of mosses or things growing.
Between the rocks I've pulled in and couched more of the wool yarn used to edge one of the fabrics a few layers up, leaving it in long loops that stand upright supported by the rocks themselves. The bonus of individually stitching your felt shapes is that they do then have these gaps and cracks between them that you can stuff bits into. I've also added to the pinkiness of the hoop by stitching pink glass seed bead sticks to compliment the green couched wool. It all started looking very heathery!
The only problem with accidentally upscaling my hoop is that when I came to tidy up and secure the back, there wasn't an awful lot of fabric to stitch through to draw it up nice and neatly so please don't laugh at my attempt here, it was the best I could do.
So there we have it, my Nempnett Thrubwell Stitchscape!
The final stitch run down for this hoop is; bullion knots, whipped back stitch, french knots, running stitch, fly stitch, couching, back stitch, satin stitch, seed stitch, straight stitch and beading.


No comments:
Post a Comment