Just in time!! Whilst the rest of the UK seems to have been buried in snow by another 'Beast from the East', my little corner is a bit neglected and we have had very disappointing amounts of snow so far. At best it's an over enthusiastic sprinkle, like a child getting carried away covering a sponge cake in icing sugar whilst their parents' backs are turned. It's enough to make me seriously consider moving to Yorkshire for better snow days!!
Still, I'll take what we've got for now as it's still snowing tiny, perfect little flakes. Having dashed out in to the snow to photograph my latest Stitchscape, I can tell you that the flakes currently falling are the most snowflakey looking flakes I have ever seen! Like small elves are sat in the clouds folding bits up and cutting them as you would at Christmas to form those symmetrical patterns in paper for a window display.

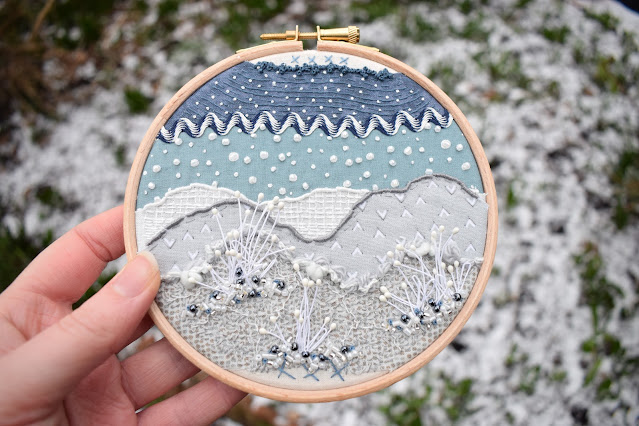
Anyway, I was very pleased to get this piece finished this morning. Not because it took a long time (it really didn't once I started stitching!) but because there was enough of a ground cover for me to take some pretty photos of it.
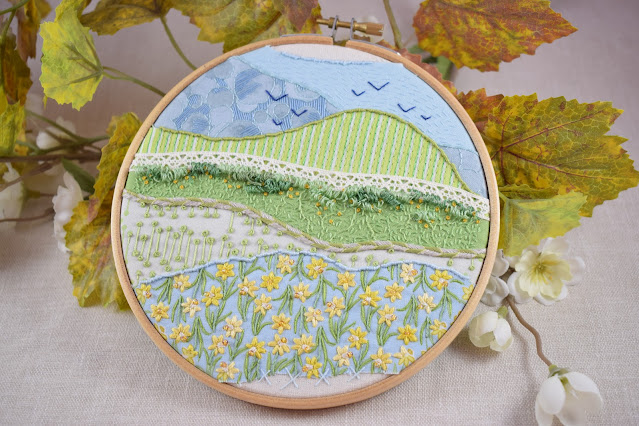
This Stitchscape was actually started in August, at the same time as the Daffodil piece, and was put together for my Youtube video (
see here) on how to select and layer fabrics. It's a long video but if you want to skip specifically to the section on this hoop, fast forward to about 56.40 minutes in (told you it's a long video!!). This piece has also been hanging around for workshops as an example of how to layer fabrics but I don't like to keep them as example pieces for too long because I get repeat workshop goers so it gets boring for them, plus the pieces get frayed and tatty after a while.
For this piece I had already got it in my mind that this was a snowfall scene, mainly because of the lighter blue layer, and the white snowy fabrics followed on from that. I seem to recall picking the two blue fabrics out of my scrap box because they were on the top together and it all kind of followed on from there.
When I finally got around to stitching it, I sort of hopped all over the place rather than working systematically through the layers. I had an idea to use more of the craft stamens that I'd used in one of my
mini seascape pieces a couple of weeks ago and wanted to take it a bit further this time. Previously I folded the stems into quarters, but I wanted a bit more height here to make them look more unkempt and plant-like so started with just folding them in half and stitching them down at the bottom. It needed another level put in though so I did end up also adding some stems folded into quarters to give a fuller appearance. Having started a test patch on the right hand side, I realised that I really needed to fill the layer with stitches before adding any more stems so started filling it with an all over seed stitch, and working a single strand of whip stitch in white around some of the seeds to hint at a dusting of snow on the ground.

The couched yarn top to this layer, and the other two clusters of stems, were added in much later as I moved on to other areas but the yarn is actually three strands in total; two of Stylecraft Special DK yarn in Silver and one in a fluffy, shiny, fancy yarn I picked up at a craft fair somewhere. I've twisted these together but tried to keep the shiny yarn mostly on the top so that it will pick up the light, then loosely couched all three on top of the layer so that it bunches up to give extra volume.
The layers above are really simple and didn't take long to do at all really - I wanted the emphasis to be more on the contrast of colours and because the hoop is fairly small, it didn't need to be packed with extravagant stitch work.
The grey rocky fabric has dark grey (single strand) fly stitches underneath each little 'v' shape in the pattern - not on the line of the pattern itself because I wanted to keep the white lines, and edged in bullion knots.
Above it, the Linea fabric (by Makower) was initially covered with a single strand of vertical back stitch following the lines of the print. It was a really tricky fabric to cover actually because it's such a fabulous pale grey, if the light was at all dull when I was stitching it, I couldn't see the lines to stitch over! I then went over it again with two strands of back stitch following the horizontal lines to make it even paler and bring out that snowy feel.
The blue layer above it, and the start of the whole inspiration, has been really simply treated with white french knots in the smaller spots (using different numbers of twists depending on the size of the spot) and a little shiny white seed bead in the bigger spots. Some spots are so big the bead doesn't cover the space which is absolutely fine, it just lends a sparkle to what's already there.
The ric rac at the top of this layer is really lovely! It's unusual for me to put such a heavy trimming at the top of a hoop because it makes the sky look heavy - which is exactly why I put it there! Not only does it go really well with the dark blue fabric above, but it helps to make the sky look darker and heavier and more oppressive, laden as it is with snow!
The dark blue layer was initially just going to be rows of running stitch in a single strand, but I've used that so often in the last few Stitchscapes I was worried you would all start to think I was a one trick pony, so I've tried mixing it up a little bit, whipping along some of the running stitch rows to form solid lines. I haven't done this for all of the rows because I liked the texture it had created - and I think it helps to break it up a bit, as does the tiny little single strand, two twist white french knots I've added as an afterthought to start the snow's journey down to the ground.

I went back to the stems after finishing off the rest of the layers, adding in two more clusters of folded craft stamens, and going mad with the beads! This is another area that just kind of developed as I'd started with a mix of white tube and seed beads, but the white on white on white just wasn't really doing it for me so I found some lovely dark beads in my collection, as well as two different sizes of clear beads to add sparkle and ice but not necessarily any more colour. Tiny french knots were added into the pile to make it look like the stems were growing out of a jumble of frozen soil and pebbles.
It's really nice to have the same beads 'falling' from the sky as well as scattered on the ground. I often say about colour balancing through a hoop (eg; if you've got yellow at the bottom, try bringing yellow up to the mid ground in some way, or as I've done here, darker beads at the bottom to balance the colour of the sky) but I don't think I've balanced beads before!
So there we have it, a lovely frosty, snowy piece for you! The stitches used in this are all very simple; french knots, whip stitch (over running stitch & seed stitch), beading, couching, bullion knots, back stitch, fly stitch and seed stitch. It's often not about the stitches themselves, it's about how you use them!


