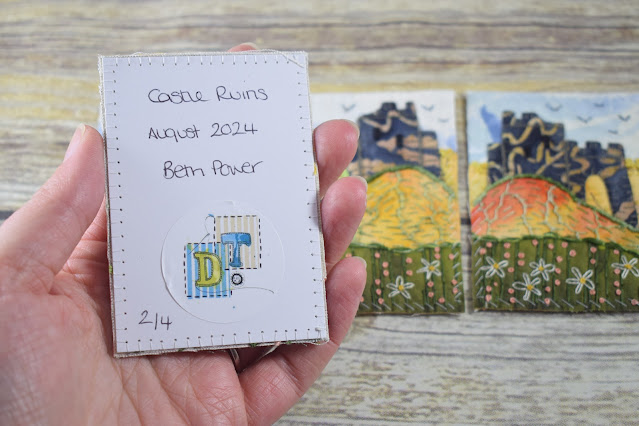
My Stitchscape Swap themes are usually thought up in August/September for the following year - I'm currently in the process of trying to think of themes for 2025 - and just because I think up the theme doesn't mean that I know how I'm going to interpret it, or even if I'll feel inspired by it. Which is much the case with the Castle Ruins theme. It always sounds like a good idea because there are so many little offshoots you could make for it and I try to come up with themes that are fairly broad without being so wild that no one understands what you mean. The idea of these cards is that they are briefly put together as a collection so they kind of have to all fit in together.
I thought about some of the castles that I have around me, but I wasn't really liking their shapes so I ended up just literally making my own up. We've been to enough castles and bits of castles and once-was-a-castle places in our family holidays to know roughly what a castle shape is and I just drew one out on paper until I was happy with the shape (it had to have a kind of drawbridge arch to it) and then I used that as my template. The castle is cut from one piece of fabric, it's not bits put together, but then I have drawn the lines and details in with stitches and thread over the top to bring areas out or distinguish a tower from a wall.
I thought the batik fabric was quite nice with the wiggy lines. You can just about make out oak leaf shapes in some of the castles but generally it was the kind of darkened, weather worn dark colours that drew me to it. Like little scars in the stonework.
The original intention was for the whole card to be quite dark and moody, but the other fabrics kind of chose themselves and ended up being fairly bright. I expressed my indecision over them on Facebook and was reminded that the reds and golds could be late evening sun adding a rose tint over scrubby grasses so I kept them in but didn't add anything else in those colours so they didn't overpower even more.
Working through the cards, the top fabric layer just has fly stitch birds on and nothing else but the birds have two colours in them, with a single strand of blue and grey added into the needle at once to give them different areas of light and dark to try and hint at movement. The next background layer is a kind of greeny/yellow fabric with gold metallic crackle lines printed on it which I liked as it was so I've just added in some french knot bushes to the top to hide the raw edge, again using two colours at once (yellow and a zesty light green), and trailing off the knots down into the fabric layer, making them smaller as they go down to hint at bushes or plants on the hillside.
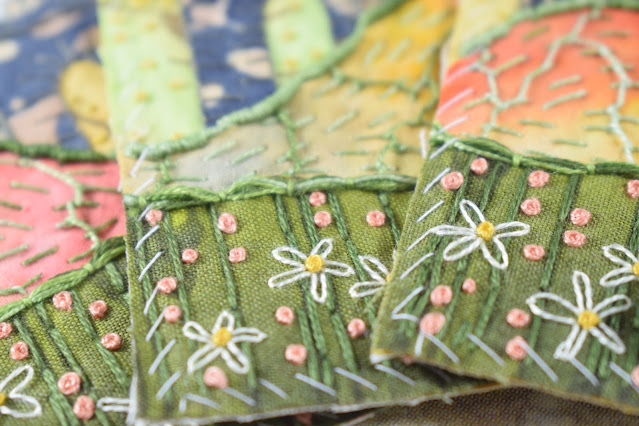
Underneath the castle is my bold choice of a sunset type print with orange and yellow and pink tones in. For this I've added bullion knots along the edge, using a whole strand thread a bit like coton a broder, so it has a slightly different texture to my stranded threads, which is also variegated greens. The bullion knots in this case have added quite a hard edge as I wanted it to look like the castle is rising up behind the crest of a hill. In the same thread I've also worked lines of running stitch and some perpendicular whip stitch which adds in some nice shadows under the thread line.
For my bottom layer I've stitched longish back stitches along vertical lines that were already in the print (a Moda ombre fabric), added delicate single strand lazy daisies (detached chain stitch) in white over the top with yellow french knot centres, and then some peachy french knot flowers around those to help kind of draw those warm colours down but in a lighter kind of way. Several different colours of green embroidery thread have been couched to the top, mirroring the variegated thread colours.
Definition to tops of turrets and walls has been added with split stitch which creates more of a continual line than back stitch - I could have just done really long stitches from one end of the turret to the next but I wanted more threads through the fabric to help hold down the edges for me. Little straight stitches have been worked over the edges of my crenelated tops and then just a stitch on the edge of the fabric to match it back in with those edges that have been blanket stitched.
The most difficult part was adding in black window spaces in my main tower - as I was out and about when I started stitching this bit, the only black thread I had on me was a coton perle which is much thicker and does not like going through batik fabrics! I had to upscale my needle size to a more hench needle and do a lot of circular wiggling to get my needle through the fabric layers for those. It did feel a bit like I was attacking the castle.
I really love these sunset photos - the gorgeous sky appeared just as I was finishing these cards off and it was almost like it was inviting me to go out and snap some photos as the colours matched the fabrics so perfectly!
The final stitch run down for these cards is; straight stitch, fly stitch, blanket stitch, stem stitch, french knots, bullion knots, couching, detached chain stitch, running stitch, back stitch and whip stitch.


No comments:
Post a Comment