

Hello everyone! I hope you are keeping well, whether you are at home self-isolating, or still out and about. It's a very worrying and uncertain time and I do feel slightly lucky that I have a job that can easily be done from home as it is most of the time anyway - plus the huge sense of mindfulness and calm that I feel when I'm sewing is second to none. Immersing myself in the stitched landscape and methodically working through a layer of seed stitch is a godsend when it seems like the whole world has gone totally bonkers with shoppers fighting over the last bag of flour from the apocalyptically stripped supermarket shelves!

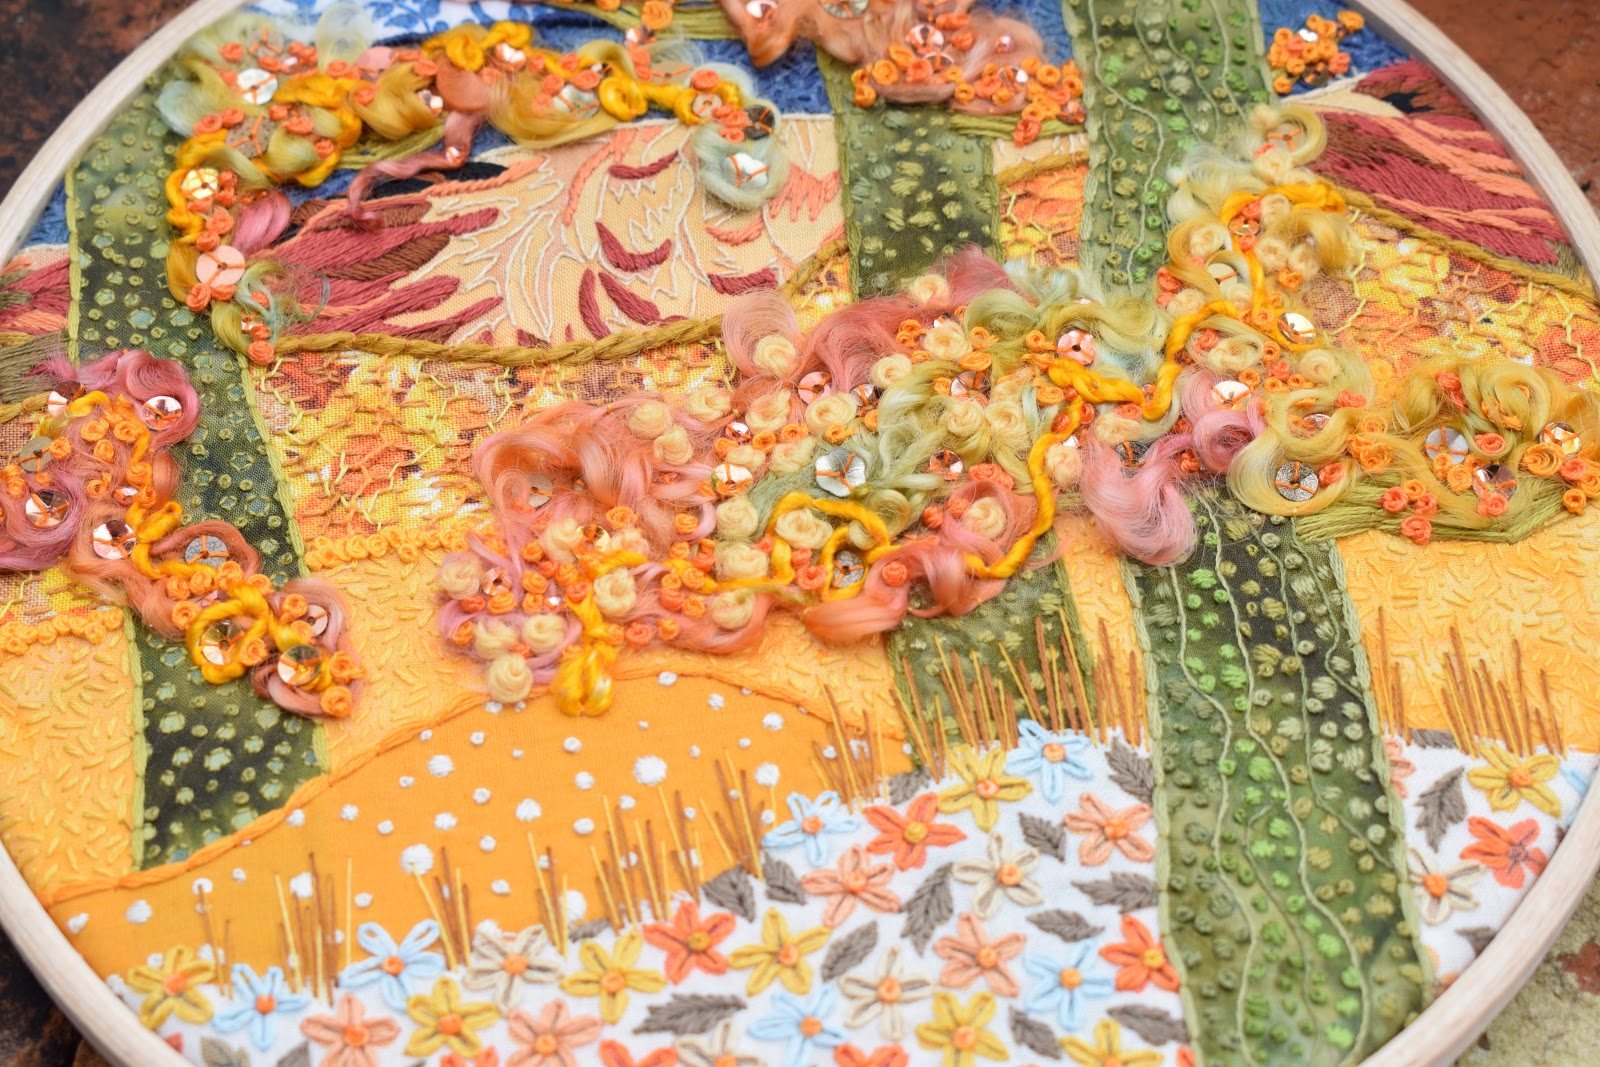
I have just finished this brazenly fiery and flamboyant Stitchscape, which has a little bit more mixed media stitched in than I usually stretch to. The vision in my head was quite clear and there were a few tense moments when I thought I had ruined everything by including the dyed yarn as initially it didn't look like much, and definitely didn't look like the image in my head.
I don't know whether you have been lucky enough to see an English woodland when it has its full Autumn garb on? You can't tell which is floor and which is tree branch as everywhere there are leaves in multiple shades of orange, yellow, gold, brown, red, crimson, ochre, mustard and everything in-between. It's a total bogglement for the eyes (yes I did just make that word up) and I think this piece does give that sense of optical illusion as the colours and textures merge and blend from the background to the foreground. Or maybe I'm overthinking it?

The lame title I've given this piece for the purposes of the blog post is totally rubbish so if you have any suggestions I'd be interested to hear them!


As always, I've started on the background layers first and, in the case of Stitchscapes with trees, I always work the horizontal layers first then do the trees afterward which seems to help reduce any bubbles being left in the background fabrics. The top blue layers have been worked really simply using a single strand of back stitch to edge the pattern on the uppermost fabric and then a seed stitch on the darker blue fabric. I did try something a bit more fun for the seed stitch (not that you can really see much of it now) by using two strands of one colour but leaving gaps which were then filled with a single strand of a different shade. I have done the same thing on the seed stitch in the yellow layer actually but the yellows are quite similar so it's not as obvious.

I had originally intended on all of the more autumnal fabrics to be considered as leaves but, actually, the top autumn fabric - which is a Kaffe Fassett design - now reminds me more of a russet tinged hillside or mountain. As with lots of Kaffe fabrics his designs are enormous and I believe this one is actually a massive Delphinium flower or similar and what is shown is only a tiny zoomed in part of the flower head. Some parts of it I have covered with thread, the same colour as underneath, in a sort of rough satin stitch but then I have left areas of more open stitching by following the lines of pattern with whipped back stitch and I love the contrast of the two types of stitch together like that. The layer has been topped really simply by couching on a few strands of embroidery floss that I've actually stitched through at certain points so it's only edging the areas where the satin stitch hasn't gone over the fabric edge.

The next fabric layer down is actually a print of lots of autumnal leaves so the colours are perfect!! I didn't want to try and pick out any individual leaf so instead I have blurred the pattern by working running stitch rows along it, and coming back down in three different colours of single strand embroidery thread, working a perpendicular whip stitch.
The bottom orangey layers have again been quite simply worked- quite in contrast to the top half - with either satin stitch/french knots over the dots on the pattern for the little humpy orange bit, and then for the very bottom layer with the flowers, each flower on the fabric has been gone over with detached chain stitch topped with a french knot middle in a couple of colours and the brown leaves worked in a really rough assortment of gathered straight stitches. A row of straight stitch stalks blurs these two fabrics together and helps to fix down any rough edges.

The trees took quite a long time to do and I started with the tree on the left hand side, going around each of the larger circular fabric marks with a single strand of back stitch, or filling in the really small holes with a french knot.
The middle tree was then worked slightly differently, this time filling in the spots with a some rough satin stitches in a couple of colours and the third tree was a combination of all of these techniques - the back stitch, satin stitch and french knots - and using lots of different shades of green as I found a treasure trove of nearly finished thread cards in my embroidery box that needed using up. I also added some lines of whipped back stitch working up this final tree to try and make it seem closer to you with more details being added in.

Underneath all of the mad sections of wool there are actually satin stitch branches! You can't actually see all of them any more as I went a little bit bananas, but they appear every now and then and it really helps to build up your trees so you know where the leaves need to go. I wanted to leave a gap in the centre to kind of hint at the leaves parting ways slightly to reveal a clearing showing my Kaffe Fassett mountain.
The wool itself was just couched down in sections over the branches and was part of a pack of rainbow dyed wool that I picked up years and years ago at a craft fair somewhere. I actually went rooting through my boxes in the attic trying to find a selection of fancy yarns and bits and bobs and I found all sorts of things, including the yarn.
My initial reaction, once the wool was on, was that I hated it and it wasn't 'orange' enough, so I started adding other bits to it like the yellow Stylecraft DK acrylic yarn french knots on the central clump (still too pale and yellow), followed by the 100% silk twisted roving yarn (the right colour and depth but too linear in the way it's been stitched?) and the different shades of orange, four strand embroidery floss french knots (starting to look more orangey and autumnal), finally topping it off with assorted steampunk bronze/copper sequins.
On their own these things wouldn't work I don't think but, actually, combined together, it makes a mad autumnal look that works really well and makes your fingers itch to touch it. The sequins also make the piece glint like sunshine is coming through - although we haven't got any sunshine at the moment for me to demonstrate that properly.


I have started leaving my Stitchscape in their hoops for display purposes. This is because a: my studio is full and I don't have room to frame anything else, b: other Stitchscapes are just hanging around on mounted squares of card and don't look very good outside of a box frame, and c: it makes a really impactful photo and is much more flat pack for storage!
The hoop for this piece is a 20cm circular hoop, although I actually stitched most of it in a 20cm square hoop so there are a fair amount of stitches that have been pulled to the back of this piece which is slightly wasteful - I shall remember that for next time.
If you want to mount your own work in this way, all you need to do is set the hoop so that all fabrics are trapped between the two rings and pulled taut across the hoop with no bubbles on the front. Trim the fabric around the edge, a couple of inches from the hoop and then take a long length of strong sewing cotton and securely knot it about a centimetre from the fabric edge. (I like to work a couple of rows of running stitch around my Stitchscapes, with the first circle round only going through the calico.) Work an even running stitch all of the way around the circle until you are back at your initial knot and pull the thread so that it gathers up the fabric towards the centre, knot this securely.
(My second circle round is worked closer to the wooden hoop so that I can trap the other fabrics into it.) Make another round of even running stitch, passing your needle through both the calico and the fabrics, trapping any trimmings you might have used in your stitches - again, once you are back at the beginning pull the thread and knot securely.
I will then trim back my cotton fabrics (not the calico) so that it makes a neater circle.

I do really enjoy the back of this Stitchscape, which is almost more bonkers than the front with the threads that have been carried over and knots created! I say it in all of my classes, but if you are embroidering your own Stitchscape, don't get bogged down in what the back looks like. You are unlikely to have the embroidery police coming round to inspect it so just enjoy the process and don't worry about the back.

No comments:
Post a Comment