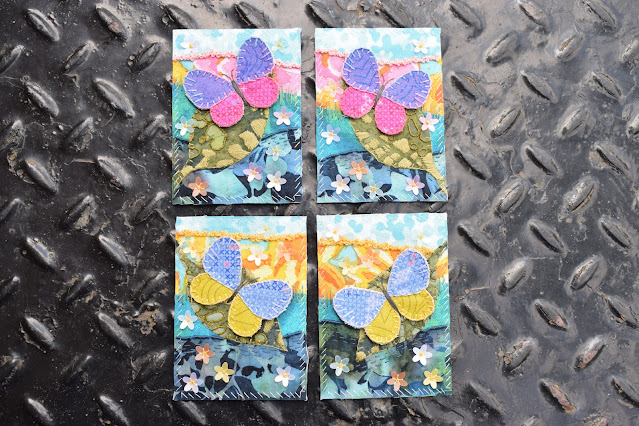
I am really pleased with these cards. The colours are bright and bold - perhaps slightly more vivid than a traditional butterfly house but quite evocative of the sorts of colours you might find in those polytunnels in the flowers and ornaments and the butterfly's wings perhaps. I could have gone very green for the background like the foliage, but where's the fun in that?
If you are a regular reader of my blog you'll know that I was working on these butterfly cards in stages and I've already posted about them a couple of times, once when I was working on the butterflies themselves (here) and once when I was working on the backgrounds (here), so this is the final finished look!
The top layer has no stitching at all, apart from the odd sequin flower which I'll come back to, and the layer beneath that is a lovely Kaffe Fassett fabric which has a huge pattern repeat and consequently has made the cards quite different from each other. Although these strips were all cut from the same square of fabric (which you can see in the backgrounds post), two have ended up with more of a pink combo and two an orange one so I've had to change my colours of thread to match. All I have done here is picked out the strongest colours and worked around them in back stitch using a single strand. Not every colour has been stitched around as I was just adding a little splash of extra detailing. I've also changed the thread colour for the edging on these pairs, using pink for french knots in two of them and orange on the others.
It wasn't intentional to have them so different, but actually has worked out really nicely as I had initially made two butterflies in yellow and blue and two in pink and purple so I've matched them to the backgrounds. A lovely coincidence!
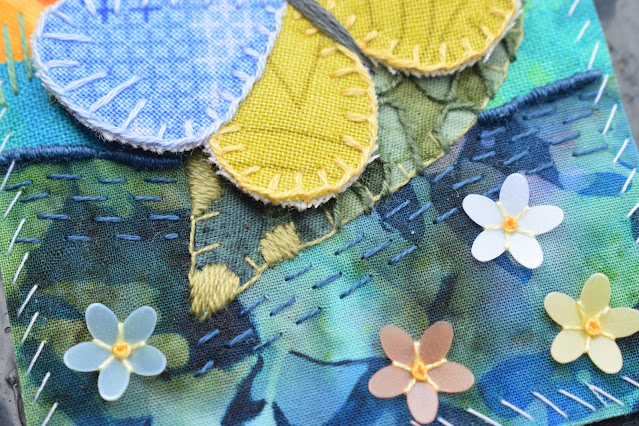
The slightly mottled blue layer below again doesn't really have any stitching on, mainly because the leaves cover most of it. I have edged it with randomly spaced vertical straight stitches just keeping that edge covered and secure, and also providing a little hint of stems and branches to the overall picture.
Contrast colours have been added with these delightful flower sequins that I picked up at the Ardingly Quilt Show this year. They are almost a pearly matte finish in a lovely range of colours that all kind of work with the fabrics here. They aren't flat either so add a nice texture that mirror the shape of the butterfly wings. I've attached them with little light yellow stitches between each petal and through the centre, then come back through them all with a slightly darker yellow to create a tiny french knot to hide those stitches and make the centres look neater.
The butterflies are only held on by the long stitches that make up the body so the wings are free. I used three strands of a dark grey floss to shape the body, with the initial stitches going down through the small piece of calico bridging those sides together, then covering it with a vague body shape. Antennae have been added with stem stitch which works beautifully in a slightly curved line.


No comments:
Post a Comment